
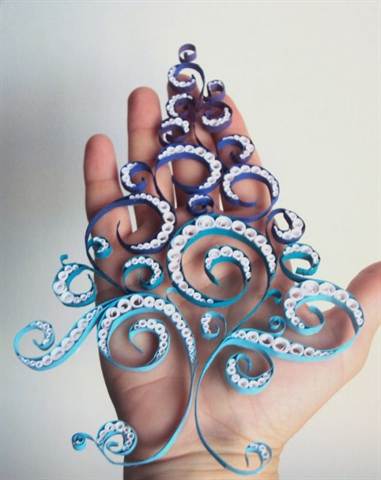
How to make a quilling star out of paper. Christmas tree made of paper using quilling technique
The master class was conducted by Claire Buswell.
Follow this simple step by step instructions and you will make stylish Christmas decorations from ordinary corrugated cardboard.
There's something special about making homemade Christmas decorations that will last. for many years. I love the nostalgic feeling that comes every year when it's time to decorate the house for Christmas!
These decorations using quilling technique would also make cute gifts, you can even make smaller versions of these ornaments for decoration gift bags.
Traditionally, quilling involves the use of thin strips of paper rolled in different curls. different shapes, which are then used to create various designs, but you can use this technique when working with thicker materials like figured or corrugated cardboard.
When using corrugated cardboard, the shapes are much larger, and the result is achieved faster than with traditional quilling. If you haven't worked with quilling before, then this project will be a good place to start as larger strips are easier to work with.
I like the way it looks corrugated cardboard from Kraft - it has a rustic, rustic feel and goes very well with the red and red and white checkered ribbon. If you're looking to decorate your home in a farmhouse style this Christmas, then our quilling decorations are perfect for the job.
You can also experiment with corrugated cardboard in a variety of other colors - red and green would look great, or use ribbon in other shades. I showed you how to make a quilled heart pendant and a quilled star that you can display, but you can make other ornaments like a Christmas tree or angels.
You will need very little material to create these decorations, so start mastering this great technique.
Materials.
Roll of corrugated cardboard from Kraft
Tweezers with extended ends
Checkered Ribbon
Narrow red ribbon
Long metal ruler
Pencil
Work progress.
How to make a heart.

1. Prepare glue, scissors and double-sided tape. Using a long ruler and pencil, measure four 25x700mm strips of corrugated cardboard and cut as shown.
 1
1
2. Fold one strip in half, twist each end tightly toward the middle to form a heart shape, and release. Set aside.
 2
2
3. Cut two 25x700mm strips in half to make four 25x350mm strips. Twist one of the short strips into a tight, closed curl and glue the tip in place. Set aside to dry.
 3
3
4. Twist the remaining three 35x350mm strips into loose curls (one curl slightly larger than the other two) and glue the ends in place as shown. Set aside to dry.
 4
4
5. From the remaining strip measuring 25x700 mm, cut two strips 180 mm long and twist them into tight closed curls, as in step 3 of these instructions, glue the ends in place and set aside to dry.
 5
5
6. From the remaining part of the large strip, cut two strips 90 mm long and twist them into tight curls. Glue the ends. Take the piece folded into a heart shape in step 2 of the instructions, and glue the largest curl inside it, as shown in the figure.
 6
6
7. Distribute the remaining curls inside the heart. Add a drop of glue to the sides of the curls and glue in place. Glue the tight closed curl made in step 3 of the instructions in the center of the composition. Use small closed curls to fill voids.
 7
7
8. Fold the red and white checkered ribbon in half and glue the ends together. Glue the tape between the two twisted ends of the heart at the top and press with tweezers. Finally, add a bow.
 8
8
How to make a star.

9. To make the star, you will need a long ruler and a pencil to mark five 25x700mm strips and one 25x90mm strip from Kraft corrugated cardboard, cut out these strips.
 9
9
10. Twist five 25x700mm strips into loose curls (their diameter should be approximately 45mm when curled as shown). Glue the ends to secure. Set aside to dry.
 10
10
11. Each of the five curls from step 10 should be the same size. Pinch both ends of each curl to form an eye shape. Hold this position for 30 seconds, then release.
 11
11
12. Turn the eye shape over and squeeze the other sides as shown in the picture to create an eye shape. kite. Repeat with each curl to create five kite shapes.
 12
12
13. Assemble the twisted shapes so that their long sides point outward and form a star. Twist the 25x90mm strip into a tight peg (closed curl) and glue the ends together to secure.
 13
13
14. Glue the kite shapes in pairs with the short sides together, then glue the pieces together to make a star. Press all the parts with tweezers. Add a tight curl to the center of the star.
 14
14
15. While the glue is still tacky, place the star on a flat surface and press gently to flatten it. Make a bow from narrow ribbon and finish by gluing the bow in the center of the star.

 16
16
Follow the Experts councils Claire to achieve professional result in using the quilling technique.
It is best to twist the strips with your hands and then pull the middle tighter with long tweezers. Once the roll is pulled tight, hold the shape firmly for 30 seconds to help maintain the desired shape.
Don't use too much glue, add just a few drops to the tip of the curl to secure it. Always use glue that dries clear.
To achieve a neat result, use tweezers to firmly grasp the ends of the curls as you glue them together. Also use tweezers when squeezing two curls together when assembling the pieces into a heart or star shape.
If you want to make your decorations in a molded form and add a glossy effect, you can cover your Christmas decorations with a thin layer of PVA glue.
These decorations can easily be adapted for other occasions, such as Valentine's Day or someone's anniversary.
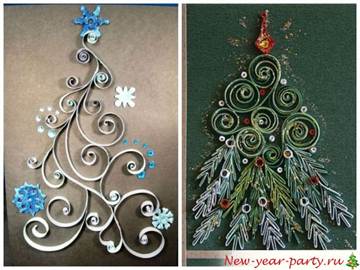
It is customary to decorate homes and workplaces for the New Year holidays. When New Year's symbols sparkle and are full of colors and lights around, a magical New Year's atmosphere appears. The main symbol of the holiday is a lush Christmas tree. Besides living and artificial Christmas tree, you can decorate the interior with Christmas trees made by yourself. Christmas trees made using the quilling technique are incredibly beautiful. This technique creates different types forest beauties. A master class that describes how to make beautiful openwork Christmas trees will help you learn how to make a quilling Christmas tree.
Variety of options
Flat Christmas trees are suitable for placing them on walls, paintings, postcards. Excellent New Year's gift There will be a painting or a postcard with an openwork Christmas tree. In this way, trees are created from lace elements and decorated with them. Elements made from paper strips are glued to a base of paper or cardboard or glued together. Decorate with beads, beads, sparkles.

This Christmas tree can replace the usual one big Christmas tree, if you do it on a piece of wallpaper and attach it to the wall. You can use unwanted wallpaper painted with watercolors and cut into strips as ribbons for rolling. After gluing the paper monograms, the resulting forest beauty should be decorated with New Year's balls, bells, bows, snowflakes and a garland of lights should be attached with sewing pins or colored paper clips. Such a tree will look creative, stylish and unusual.

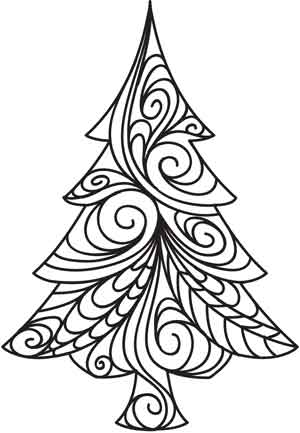
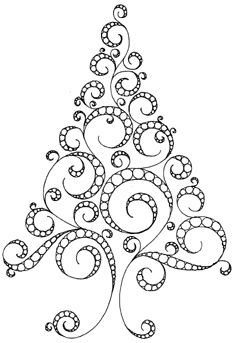
For an ornate, elegant image, you need to draw an outline on the base to which the paper tapes will be glued. The outline should be made pale so that it is not noticeable when finished. You can print or redraw ready-made tree diagrams.


Manufacturing of planes
This master class will help you create a flat Christmas tree from lace drops and monograms.

To create a flat Christmas tree you need colored paper or ready-made quilling strips, scissors, PVA glue, toothpick or a special device for curling paper tapes. It’s good if there is a special template form with cells of different diameters (lumograph) to create elements of the required size.
You should make blanks for the branches. Wind the paper strips onto a stick.
Using a mold, make an element of the required diameter.
Glue the tip of the strip and shape the element. To do this, the base should be held with your fingers.

We pinch the edge of the element and thus get a droplet-shaped element. You need to make 8 such drops.

We also need two-color elements of the same shape. Tips of strips different colors glue.

Starting from the green end, wind the ribbon and give the element the same drop shape. You will need 15 such drops.

Now we need to make the next element, which looks like a bird. To do this, several stripes of green and blue flowers need to be glued at the base. By twisting it on a stick in different directions, give it the desired shape. Make 4 of these birds.

Another necessary element will be a monogram. Glue several multi-colored strips at the base and twist them onto a stick. Having unfolded the monogram, we glue the ends of the ribbons together in a cascade. 4 such elements will be needed.

All branches are ready. Now you can start assembling the Christmas tree.

Now roll tight rolls from bright strips of paper.
Decorate the Christmas tree with the resulting multi-colored balls.

Now you can glue it to a postcard, insert it into a photo frame, or attach a loop to the top of your head and decorate your interior with it.
Creating a three-dimensional Christmas tree
Volumetric three-dimensional Christmas trees can serve as table decorations. The elements are either glued to each other, forming a cone shape, or glued to a cone-shaped frame made of paper or cardboard.


Such a cute tree will make your workplace elegant and create festive mood. Using Christmas trees in compositions with a New Year's theme, you can decorate rooms in the house. Also quilling volumetric Christmas tree will be a wonderful gift for the upcoming holidays.


They will help you make a three-dimensional Christmas tree step by step photos And detailed description its creation.
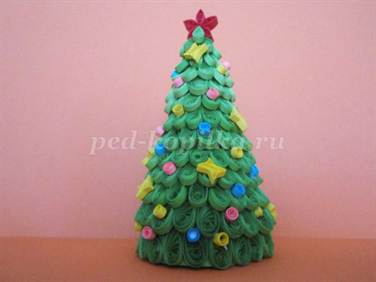
For production you will need paper tapes, green leaf colored cardboard, compass, scissors, glue and a mold with round cells.

To make the frame, you need to measure the desired height of the tree on cardboard, this will be the radius of the future circle. Draw a circle with a compass so that the cardboard occupies a quarter of the circle.

From the resulting quarter circle we make a cone.

Now you need to make blanks for the Christmas tree branches. Roll the green ribbon into rolls. Using the mold, determine the diameter of the element and glue the tip.

To shape the roll, you need to squeeze it with your fingers on one side. The result will be an element similar to a drop. You need to make the following elements different sizes: large, medium and small.
Christmas tree using quilling technique
In today's article, we decided to show you an excellent master class on creating a simple Christmas tree using the quilling technique.
To create a Christmas tree using the quilling technique you will need:
Dark green stripes 0.5 cm wide, 4 strips 1 cm wide
Yellow stripes about 0.3-0.5 cm wide
Red or pink stripes about 0.3-0.5 cm wide
Toothpicks
PVA glue, Moment Crystal glue for gluing parts to the barrel
Christmas tree using quilling technique step by step:
To create a Christmas tree, you will need to make all the parts shown in Fig. 1. They are made the same way, the difference is in the width and length of the stripes, and in the shape.

Start by creating spruce branches, which are made from green strips 0.5 cm wide and 10 cm long (4 pieces), 15 cm (4 pieces), 20 cm (4 pieces), 30 cm (4 pieces) .
We described in detail how to make the parts. Try to wind the strips so that each of the 4 parts of the same length is the same size.
All 16 spirals must be given the shape of a “curved drop”. To do this, you need to clamp one end of the spiral and lift it up a little.
Now let's create a trunk for the Christmas tree. For this you will need 3-4 strips about 10-15 mm wide. The author made 4 strips about 1 cm wide. Wrap the strips tightly around a toothpick and glue the end without unraveling the part.
Make a part in the form of a non-curved, simple drop for the top of the Christmas tree from a strip about 30 cm long (Fig. 5).

The resulting parts must be glued together, for which use Moment Crystal glue. First, glue the barrel parts (3-4 elements) together. Then insert a toothpick into it to glue the branches. Leave the trunk to dry sweatily so that it does not start to break during the process of gluing the branches.
The branches must be glued in rows, starting from the top.
Create a Christmas tree decoration using thin stripes of pink and yellow flowers. For a yellow star you will need a strip of 10-15 cm. For pink toys you need a strip of 7-10 cm. Twist the toys without a toothpick to make them small.
Glue the toys onto the Christmas tree in a checkerboard pattern using tweezers and PVA glue. Then glue the top of the spruce with Moment Crystal glue and attach a yellow star to it.

The Christmas tree using the quilling technique is ready! Christmas trees can be created in completely different sizes and used to decorate the Christmas tree or New Year's table.
Based on materials from the book "Paper Quilling for the first time", Bartkowski Alli, pp. 43-44.
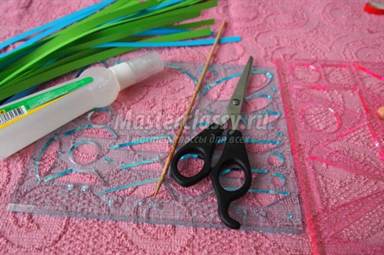
The quilling technique provides incredible opportunities for creativity, and the results are stunningly beautiful things. But it requires patience. Today we will learn how to easily and quickly make a very beautiful New Year's star pendant. Creating a star will take 20-30 minutes.
We will need:
Strips of thick paper
- Glue
- Quilling tool or wooden skewer
- Ribbon

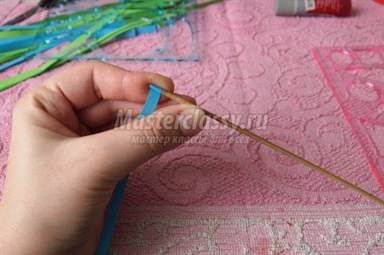
1) Cut strips of paper 1.5-2 cm wide. Divide them into equal long parts. We twist at one end using a quilling tool, but do not twist it all the way.

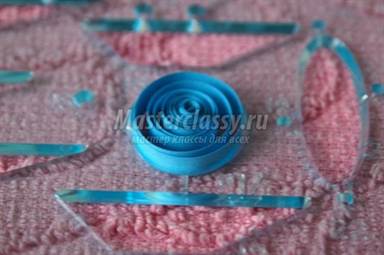
2) Loosen the curl inside a little so that it is not too tight. We take another strip and try it on along the length of the curl. We cut off the strip and glue one side to the free end, the other to the curl itself. The shape should be a loop.

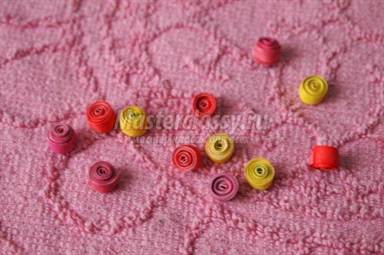
3) Prepare 5 loops with curls and glue them together with the wide part, leaving a little space in the center. We hang the resulting star on a ribbon. Ready!


Ekaterina Fesenko specially for Podarki.ru