
DIY wallet for paper money and coins: patterns, photos. How to make your own wallet from leather, beads, fabric, jeans, felt, elastic bands? How to sew a simple and convenient wallet with a zipper Do-it-yourself men's wallet from jeans
This master class was shared by the Quiltik master.
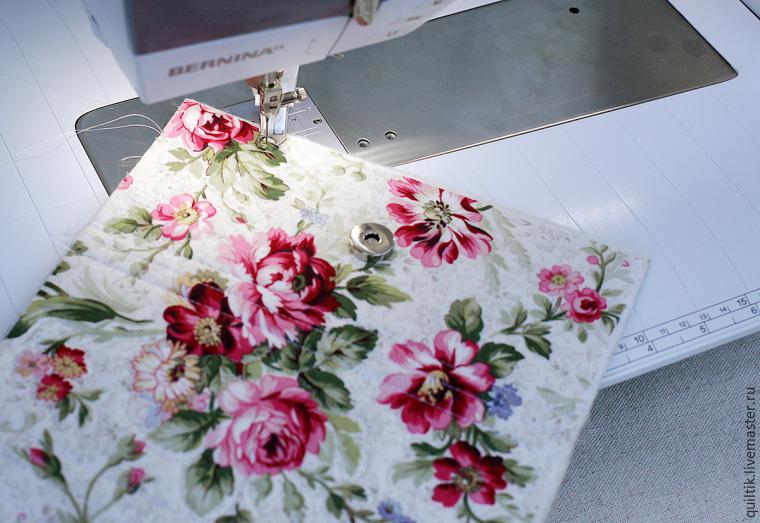
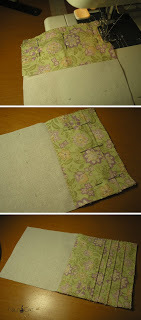
The outer front of the wallet.
Consists of parts:
1. Front part. Size 21x30 cm.
2. Soft padding - I have cotton filling. It will make our wallet soft-tactile and pleasant to the touch. Can be replaced with ironed padding polyester. Size 21x30 cm.
3. Any fabric sealant - I have non-woven fabric. Size 21x30 cm.
4. Interior. Size 21x30 cm.
5. Seal for bags on an adhesive basis. Three parts - 21x9 cm, 21x9 cm, 21x7 cm.
6. Magnetic clasp. Can be replaced with a button.

Assembling the pie.
We seal the front part with non-woven fabric. We iron the bag seal onto the inside.

Let's make our sandwich. Secure with a longitudinal stitch. We sew along the seal at a distance of 2-3 mm from the edge.

Install the magnetic clasp.
1. External valve. We bend the front part and the gasket. Install the fastener on the seal.
2. Internal valve. We bend the seal. We fix the fastener to the gasket and the front part.

Quilting the sandwich.
This is what you should get:
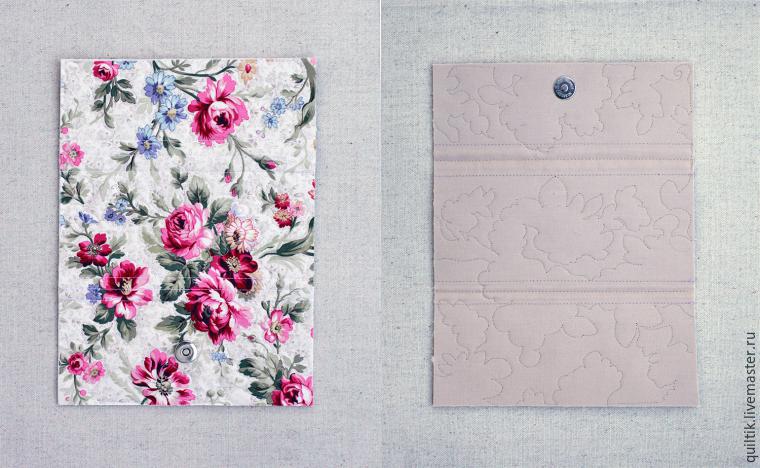

We round the corners and trim them.

The outer part of the wallet is ready.

The inside of the wallet.
Consists of parts:
1. A rectangle pre-glued with non-woven material. Size 19x18 cm. For the outer part of the coin pocket. 1 piece
2. A rectangle pre-glued with non-woven material. Size 19x17.5 cm. For the inside of the coin pocket. 1 piece
3. Rectangles for decorating the ends of the zipper. Size 3x4 cm, 2 pcs.
4. Zipper with stroke limitation up to 16 cm.

Pattern of the membrane. Fits into a rectangle 10 (height) x 15 (length) cm.

Let's design our zipper. We cut off the excess. The length of the workpiece should be 19 cm.

Fold the rectangles and the zipper along the long side. Apply the larger rectangle to the front of the zipper, and the smaller one to the back of the zipper. Sew it together.

We sew the second side in the same way. It should look like a figure eight.

We turn our pocket inside out in a motion that pulls the larger rectangle onto the smaller one. Ironing.

Secure our design with a seam on the sides to make it easier to work with in the future.
The pocket should fit comfortably into the wallet with plenty of width and height.

We prepare the membranes. We fold the blanks facing each other, stitching at the top and bottom. Turn it inside out, iron it, and secure it with a stitch.

Next, we make serif folds on the membrane (the fold location is indicated in the pattern). We bend the membrane around the edge of the pocket so that the corners of the folds lie at the same level. We sew at a distance of about a centimeter from the edge.

I sewed the first such wallet in a soft pink checkered pattern as a gift for a girl. Then I repeated it to myself in denim version, with [cuttersk. And a new wallet due to numerous requests from my needlework friends
I sewed it specifically to show the whole process of its making.
The finished (unfolded) size of the wallet is 5 x 8.5 inches (approximately 12.5 x 21 cm). This size is taken into account so that you can put paper bills, change and all kinds of cards in it, which are becoming increasingly popular.Irina Moore
All dimensions are given in inches.
For reference: 1 inch = 2.5 cm.
1. We cut out taking into account seam allowances from denim:*2 pieces A 5.5 x 9.0 inches. the base of the wallet, its cover;
* 1 piece B 5.0 x 9.0 inches. compartment for paper bills;
*1 piece H 5.0 x 3.0 inches. pocket for coins;
* 1 piece D 5.0 x 3.5 inches. pocket for cards;
* 1 piece L 5.0 x 2.5 inches. pocket for cards.I provided 4 pockets for cards. But, due to the fact that denim fabric is quite dense, I made two of them from ordinary cotton fabric to reduce the thickness of the wallet and avoid difficulties during assembly. Thus, we cut out two more pockets for cards from cotton fabric:
*1 piece E 5.0 x 8.0 inches.
*1 piece W 5.0 x 6.0 inches.2. We start working with the cover.
To strengthen it, I used 808 Craft Fuse from PELLON. This material is good because it is thin, like paper, but holds its shape very well without losing its elasticity.
If it is not there, then both parts need to be reinforced with dense adhesive one-sided interlining or rigid dublinin.
We strengthen one of the parts A (the top one) and decorate it at our discretion.
Stepping back 1.25 - 1.5 inches from the short edge, install a magnetic fastener on this part in the middle.
Let's put these blanks aside for now.
3. We apply tape to all the denim parts of the pockets and one side of the zipper.When sewing a zipper, start sewing the binding above the zipper stopper, approximately the width of the trim. Then this reserve will be hidden under the trim-edging, which you will sew on the other side.
4. Fold both parts of the pockets made of cotton fabric (parts E and G) in half, line them inside with a “web” of the appropriate size, and iron them.
Stepping back from the fold, we lay one or two parallel decorative lines. This double pocket is more convenient to use when taking out a card.
5. Now we attach the edged part of the coin pocket (part B) to the second side of the zipper so that the allowances from the top stop on both sides are the same.
6. Place the edged side of the zipper tape on top of the short side of part B and stitch it along the edge of the trim.We secure the zipper along the top with a cross stitch as close to the edge as possible, so that later this stitch does not peek out from under the edging.
On part B we outline the line of the center of the finished wallet, mentally dividing the resulting workpiece in half vertically.
7. On the resulting blank we place the edged blanks for the pockets (from left to right, parts E, D, G, E, from largest to smallest), as shown in the photo.
We align the sizes of all folded parts.
8. We edge the top edge of the blank with tape to create a compartment for paper bills.
9. For the cover, we prepared two parts: A outer one (with a clasp) and an inner one.
Fold them back to back and line them up to the size of the finished wallet (5 x 8.5 inches).
External detail with clasp at the bottom!
On the inner part, mark the middle line.
10. Place the prepared pocket blank for paper bills on top, aligning the middle line and the lower edges of the parts.
We fasten everything with pins.
11. We connect all the parts of the wallet with a stitch along the edge so that they do not move relative to each other.
The corners need to be rounded. To ensure that they are the same, it is convenient to do this using some kind of template.
12. Well, the wallet itself is almost ready. It’s time to start fastening it.
Cut out 2 pieces of denim, 4.0 x 1.5 inches.On one side, we round the corners on both blanks (as in the photo).
Pay attention! The length of the fastener strap may vary depending on the width of the edging and the thickness of the resulting product. Therefore, check its length according to your option.
13. The fastener valve parts should be reinforced with non-woven fabric.
Place the second part of the magnetic lock on one piece.
Fold the parts together with the wrong sides and connect them (sew them) with a tight seam [zig-zag along the edge, as if overcasting.
I did it decorative threads, the same as the front cover was decorated with.
14. Sew the fastener flap as shown in the photo.
Just a little time left - and we are there!
15. And the final chord: the edging of the almost finished product.
We cut out a strip of fabric on the bias and fold it in half lengthwise.
We smooth it, first tucking the bias cut to the inside by 0.5 inches.
We start working from the fold point of the wallet. The binding joint here will be least noticeable.
We go around the entire perimeter of the wallet with tape.
16. To close the edging, we adjust the end of the binding to its beginning to the short side of the cross section, going beyond it by about 0.5 inches (see photo!).Now you can cut off the excess trim.
17. Fold the binding onto the inside of the product and sew it on inner edge by hand with hidden stitches.
The joint of the binding can also be secured with several hidden stitches, or you don’t have to do this. (I don’t do this, the binding is tight and can’t turn out).
18. Now iron the seams, check that the clasp holds securely and the wallet is ready!
If you are sewing it as a gift for someone (or even as a gift for yourself, your loved one!), do not forget to put a small coin in it! They say it’s customary to give wallets as gifts so that they always contain money!Good luck to you!
Let your new wallet always contain you-know-what!


Ideas for creating wallets from different materials and various forms.
Dedicated to needlewomen and women with original taste. We invite you to create a wallet with your own hands. By the way, experts in Feng Shui and magic are sure that money will flow like a river into such a wallet. We advise you to try and check.
DIY fabric wallet: patterns, photos
Two-tone wallet with magnetic clasp, which will fit perfectly into your wardrobe and will give you a feeling of spring and the approaching warmth. A variety of shades and different combinations allows you to safely experiment and gives you the mood for every day:
- Choose a beautiful fabric different colors and shades and buy material for stuffing - it can be felt measuring 31x21 cm. This is slightly longer than a landscape sheet.
- Lay it out from the inside out so that about 1 cm remains on all sides, and draw lines along the contours.
- Also outline the felt itself with a pencil so that you can see where to stitch.
- The same thing needs to be done with fabric of a different color.
- Then connect the two materials together by removing the felt and placing the outside side inward and the inside out.
- Sew three sides and leave the short side, 21 cm long.
- Turn it right side out and place felt inside.
- Before hemming the 4th side, carefully tuck it inward - first the corners, and then the sides themselves.
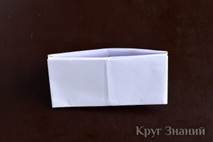
- Having decided which side will be the front, divide the rectangle into approximately three parts.
- Now sew two parts together, the third is needed to close the wallet.


Everything is ready! You need to add small details, sew on a clasp and your favorite decoration. Wear it with pleasure!
Video: DIY fabric wallet
DIY leather wallet: patterns, photos
This stylish wallet is ideal for both women and men. You can store money cards, credit cards, business cards, and cash in it. It’s very easy to make, even novice needlewomen can do it:
- Choose the leather you like so that it matches well with your handbag and is of good quality.
- Then carefully trace 6 pieces onto hard cardboard and cut them out of leather.
- You can connect the individual parts together using good glue for this material.
- Modern sewing machines have all the necessary programs that help you save time and effort to bring everything you have planned to life. To sew a zipper and make a compartment for small money, use part 4.
- The fifth part, folded like an accordion, is glued under the fastener, and the second free end is glued above it.
- For strength, use a machine and attach the finished parts of the future wallet to part No. 3.
- Three beautifully cut parts of the 6th part should fit perfectly with the 2nd part of part No. 3.
- They need to be connected so that they are located one centimeter from each other and, for strength, stitched again with a machine.
- Then connect the outer parts of the future pockets with parts No. 2, leave the inner ones as they are.
- When you have finished with this stage, feel free to start sewing the first and second parts, everything should match, nothing should be superfluous.

Leather wallet pattern

Following the pattern, you can make a very beautiful and practical wallet with your own hands. Good luck in all your endeavors!
Video: DIY leather wallet
Crochet beaded wallet: pattern
In order to make yourself an elegant beaded wallet you will need:
- Beads desired color and quantities
- Denim thread
- Hook of the most suitable number
- Clasps of the desired shape and required length
- Scissors.
In order to knit according to the pattern you need:
- Start from the top rows, stringing 18 beads multiplied by 7 onto a thread, and then each row from left to right, repeating from top to bottom 7 times.
- Cast on a chain of 7 loops, close them in a circle and knit 1 r. Art. without n, in each loop.
- Next row, knit 2 tbsp. without n, alternating one loop with beads, another - in the same loop without beads, and so on until the end.
- Row 3 – add a bead to each loop, knitting st. without n.
- Having knitted the desired height of the wedges throughout the circle, tie without beads starting from the middle of the 3rd st. without n.
- In the last row of each wedge, knit 2 tbsp in one loop. without n.
- Having knitted 3 r. with beads and 3 p tbsp. without n., can be sewn, it is better to use monofilament to attach the fastener.
In order for the product to expand, you need to knit it into a loop with beads at the end of each segment, st. b/n.


Beaded wallet

Don’t be discouraged if you don’t succeed, this type of knitting requires great perseverance and patience.
Video: Stylish wallet with beaded embroidery
How to make a wallet from rubber bands: diagram
Best suited for this type of wallet bright elastic bands different colors (200 elastic bands of one color and 175 elastic bands of another color). It is very functional, comfortable, fastens with a large button, and you can use your savings at any time.
Using machine, you can make such beauty while enjoying the process itself, and if something doesn’t work out, you can easily redo it, which is impossible to do when working with fabric. The open sides of the posts of the near row should face right side, and the far one - to the left:
- Choose your favorite color for the bottom of the wallet.
- Throw on an elastic band using the hook from the first stitch of the near row to 2 sts. second row.
- Repeat the other row in the same way only in the opposite direction (ultimately, you should end up with the letter X).

- To move on to the next stage of weaving, carefully place elastic bands on each pair of stitches. and repeat until the end of the row. It's not difficult at all.
- Then grab the bottom elastic bands on each post, and without pulling too much, remove them inside the product.
- Don't be afraid that the wallet will unravel, the weave is very tight and they intertwine well.
- Repeat the pattern from the beginning until you have completed 14 rows. There is nothing complicated about it, even beginners can handle it.

- After this stage, smoothly proceed to weaving the fastener, which consists of 12 rows of the far edge.
- You need to make a hole for the button so that you can easily open and close the accessory. To do this, find the middle and from the central st. remove the elastic bands and place them on the table. to the left.
- Having reached the central station. put on an elastic band in the shape of a figure eight and then continue in the usual pattern until the end of the row.

- To complete the stylish wallet, simply take the elastic from the far right st. and throw it over the post, which is to the left, then take the same elastic band, grab the two lower elastic bands from the inside and throw it over the post to the left, repeat until the end of the row.


Video: DIY wallet made from rubber bands
Felt wallet: patterns, photos
You will need:
- 2 pieces of felt in different colors
- sheet of paper
- needles
- threads
- scissors
- fasteners
- ruler
- pen
The action plan is as follows:
- Make a pattern from a sheet of paper: 11 cm high, 20 cm wide, and a clasp 6 cm high.
- Transfer to felt and cut out. If desired, you can round the top corners.
- Take the template and cut 6cm of the fastener, then trace onto a different color felt and cut out again.
- Now use a needle to sew the two pieces together using a buttonhole stitch and attach the clasp.


Video: Stylish felt wallet
Crocheted wallet: pattern
For knitting you will need thick yarn and a hook of a suitable size:
- Cast on a chain of the required number of loops, based on the size of the wallet you want.
- After closing the ring, knit 3 rows of st. without n. This base can be matched with any interesting pattern, which holds its shape and does not stretch.
- I Row: st. rise, 1 tbsp. without n, from one loop knit a fluffy st. with two n. Repeat 5 times.
- Back off 3 loops, knit st. without n, then after 3 loops repeat the pattern from the beginning.
- II 3 air. n, 3 lush tbsp. with a common top in the interval after the first st., 3 air. p, art. without n., 3 air. p and again 3 lush column and so on until the end of the row
- III 3 cart. n, in the center of the flower, tie 3 lush sts, sts. without n., 6 lush art. s n. to the center of the flower, etc. to the end of the row.


Heart wallet

Crochet wallet

DIY wallet

Delicate wallets
After the product has been received the right size close the loops, sew carefully and attach the original clasp.
Video: Crocheting a wallet
DIY children's wallet
It’s very easy to sew such a funny wallet with your own hands, there are a lot of options, you can choose one to suit any color and taste. It is important to take into account the interests of the baby himself so that your work is appreciated and brings pleasure. Create together, it not only brings you closer, but also gives you a lot of positive emotions and real happiness.
Ask your child to help you trace the details, this will speed up the process, and the time spent together will be beneficial for him. Using this pattern you can make a very beautiful wallet for your little treasure, put your whole soul and heart into it.

Wallet on the back, diagram


Wallet for a child

Pick up bright fabrics that go well with each other, think about the decor and an interesting clasp. Cut out the shape of a wallet in 3 parts at a time, and then sew funny animals on top of it that will cheer you up every day. Take into account every detail, carefully tuck the corners, stitch and the miracle wallet is ready for use!
How to sew a wallet from denim?
Every person has favorite jeans that have lost their look, but to make them stay in your wardrobe longer, you can make an elegant accessory out of them that will match with different styles Your clothes. There are many options and there are no limits to your imagination. Sit down and create!

Decide for what purposes you will use it: to save coins, cards, business cards, or for cosmetics, glasses or a phone. You can use the previously proposed patterns, combine fabrics quilted with decorative thread, use lace, embossed flowers or original fasteners.
Play it so that it is very stylish and at the same time attractive. You can use the pockets as decoration or a place to store small items.
Video: Handmade denim wallet
How to make a coin purse with your own hands?
To prevent coins from falling out of your wallet, use a coin holder:
- To do this, select the required size clasp in advance and make a pattern of 4 parts.
- 2 pieces of fleece for lining.
- Connect the lining to the main fabric and attach the clasp.


Now your coins will be safe, and you will get tremendous pleasure from the process itself. Play around beautifully with the help of decor and such a wallet will become your favorite in a very short time.
Video: DIY coin wallet
DIY men's wallet
Men prefer to wear leather wallets or purses different styles and design. Let's look at some options. You can sew a classic wallet from genuine leather different colors or substitute leather with 3 sections:
- for change
- large paper bills
- pockets for cards and business cards
To do this you need leather of your favorite color. The workpiece will be 21 cm high and 33 cm long:
- Cut a coin pocket 21 cm wide and high.
- Cut a hole in the middle for the zipper and use a machine to sew it to the workpiece.
- If missing sewing machine, you can fasten the zipper using PVA or wood glue.
- Accurately mark the lines of pockets for business cards, bank cards, and driver's licenses.
- Mark the seam to connect the parts and adjust the thread tension when sewing.
- After this, decorate the top of the wallet with an interesting clasp or rivet of your choice.
- You can emboss the initials of the future owner if you are doing this as a gift.
- You can also adjust the size of the product and make it in the form of a small book or purse.


Video: DIY men's wallet
DIY women's wallet
Women love to stand out and experiment with materials of different textures, formats and colors. There is a place to let your imagination run wild and bring all your ideas to life. There is no limit to perfection, new directions and new visions of old traditions are emerging.
If a product is made by hand, it has even greater value than something bought in a boutique. expensive thing. Such things are unique, filled with positive energy, carry good mood, originality and expression of your own style.
Undoubtedly wallets from skin are extremely popular, they emphasize the wealth and taste of its owner, but an exquisite wallet made of beads, felt, yarn, different types and the color of the fabric will not leave indifferent even the most demanding and fastidious fashionista.


Leather remains my favorite

The shape can also be different
The style can be different: round, oval, rectangular, in the form of a drop, and a small book, depending on what you like. Jeans with embroidery, beads, embossed flowers, initials or a certain sign look great. Choose your model and put your whole soul into it!
How to decorate a wallet with your own hands?
Real needlewomen can use various techniques and decorate the wallet using buttons, unusually shaped buttons, pearls, decorative flowers, sequins or pom-poms. You can make fringe from threads, embroider with satin stitch or cross stitch, and print various designs and signs.
Widely used special canvas or lace, which gives the product sophistication, elegance and uniqueness. Tenderness and lightness can be given satin ribbons different widths and color range, which can be collected and laid out in the shape of a flower, bow, animal, as you wish.

Wallet decorated with buttons and homemade flowers

Beaded wallet

Chic wallet decoration

The modern market for creative goods opens up enormous opportunities for creating real masterpieces of art. Fasteners of interesting shape, quality and structure add a certain charm and a certain emphasis.
Special stickers and peculiar decorative beads in the form of a circular snake look completely different on different types fabrics. Considering all these recommendations, you will be able to sew exactly what you have dreamed of for so long, but never dared to start. Improve, develop and never stop there.
Video: DIY wallet decor
DIY zipper wallet
Wallets with a zipper are very elegant and convenient, but due to frequent use, it is the zipper that fails and this is the biggest drawback. Appearance may be perfect, but the clasp needs replacing. Therefore, for durability, choose the most reliable zipper-spiral No. 7. The pattern consists of 3 parts:
- Main unit
- Compartment for storing small items, which sometimes accumulate a lot
- Interesting side inserts, which harmoniously fit into the main color of the product.
Do the following:
- Cut the lining 22x32 cm and prepare two fasteners.
- Connect the parts together and sew carefully.
- Glue the stiffeners onto the main lining and connect it with glue to the coin holder.
- Then glue the stiffeners onto the parts of the upper part and bend the edges nicely.
- All that remains is to carefully sew on the clasp and the accessory is ready.
- To connect all the parts in one product, you need to make a delay for the future seam - without thread.

DIY zipper wallet with decor

Stylish wallet
Do everything very carefully and remember that sometimes you need to hurry slowly! Haste in this case is contraindicated. Think about the decor, and such a thing will go perfectly with your handbag.
Video: Making a Wallet with a Zip
How to clean a leather wallet?
In order to restore a leather product, before starting the procedure, you need to keep it in a dry room at a temperature not lower than 25 ° C:
- Take warm water (300 – 400ml).
- Add soap, stir well until a light soapy solution forms.
- Pour a spoonful of ammonia into it.
- Use a clean cloth to thoroughly wipe the wallet several times.
- Leave to dry.
At the second stage you need castor oil or glycerin, apply a thin layer of one of these oils to your wallet. Wait 1-2 hours and see what condition the skin is in; if it is still dry, you can still carefully apply a second thin layer.

If the product is clean, using these oils you can maintain its ideal appearance and increase its service life. If your wallet dark colors , then you can gently wipe it with a cloth previously soaked in ground coffee beans.
Then carefully, removing the remaining residue from the surface of the product, wipe it again with a dry soft cloth, and then apply a thin layer of the previously mentioned oil. Take care of things, take care of them, because you have put all your soul and love into them, and they will delight you and bring you pleasure!
Video: DIY fruit wallet
In order to learn how to make a wallet with your own hands, you need to decide what material the master’s soul lies in working with. Beginners in sewing needlework should not be intimidated by the large number of templates and patterns presented for public viewing by other craftsmen. You can start creating things with your own hands with the simplest and most proven ideas.
Postcard wallet
If a celebration is approaching, but a gift has not been chosen, you can please the recipient with a cash gift, carefully placed in a wallet of your own making.
For a wallet made of cardboard or paper, you will need an A4 sheet of the first or second material. We fold this sheet in half on one side and the other.
The corners need to be bent into isosceles triangles towards the center of the sheet.

We fold the corners of the resulting part to the edge of the previous ones.

Fold the top and bottom edges towards the middle.

Turning the part over to the other side, fold the side edges towards the middle.

Turning the part over again, fold it in half away from you. An oblong hole should form at the fold.
Inside the hole you can feel one of the triangles, which should be carefully pulled out, which will turn it into a wallet lid. You will get a paper wallet, as in the photo:

Fabric model
To create a simple wallet for everyday use, you can use any fabric. Taking into account your preferences, in the next master class you can sew not only fabric, but also denim wallets.
To create the product you will need:
- two types of fabric for front and internal parts;
- small fabric for working moments (hereinafter referred to as TRB);
- padding polyester;
- bias tape;
- zipper;
- button.
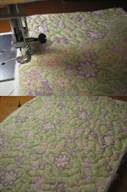
Before use, the fabric should be ironed well to ensure a smooth surface. From two types of fabric and padding polyester, we make patterns measuring 21x16 cm, which we fold in three layers, placing the padding polyester in the middle. We sew the resulting layers together, making seams throughout the entire fabric in the form of a grid. After work, cut the part to a size of 20x15 cm.
- four 11x5.5 cm;
- one - 11x4 cm;
- one - 11x8.5 cm;
- one - 11x3 cm;
- one - 13x20 cm;
- one - 14x4.5 cm;
- one of the TRBs is 11x20 cm.
The four parts indicated in paragraph 1 should be folded and stitched on one of the long sides. These parts need to be sewn onto the TRB. First, the part from step 4 is sewn to the TRB.

Then we sew each part from step 1 in a U-shape to the TRB, indented from the previous edge by one and a half centimeters. This is how we create compartments for business cards.
We sew the parts from steps 3 and 4 to the zipper, first the large one, then the small one. In this case, they will be stitched in the same position as shown in the following photo:

On the wrong side of the resulting part, measure 10 cm and trim off the excess, leaving the lock intact.

The resulting part needs to be sewn to the TRB with a seam along the perimeter, and, having reached the lock, it should be opened almost to the end and sewn further along the edge of the part.

With bias tape you need to cover the seams in the middle of the part along the lock and one of the long sides of the part. During this work, the excess ends of the lock are cut off. It turns out this detail:
We process the part from step 5 with bias tape. We sew the resulting parts together, after which we begin to work with the part from step 6 - the valve. This part needs to be stitched on three sides.

After this, the valve is attached to the middle of the front side of the main part.

We process the edges of the part with bias tape.


You need to punch a loop on the valve, after which a button is sewn to the wallet along the projection of the loop. This is the end of the job.

The same wallet can be sewn from jeans, but without using padding polyester.
Due to the density of denim, it is better to use regular fabric for the inner parts, otherwise the wallet will be too thick at the seams and uncomfortable.
You can learn more about creating wallets from denim or old jeans in the videos below.
Knitted option
To create such a wallet, you need to arm yourself with knitting needles, crochet and yarn. We cast on 18 loops, after which we begin to knit everything next rows in a facial way. Upon reaching 20 cm in height, on both sides of the canvas you need to start removing loops in every second row: 2 and 3 so that the wallet has rounded tops. When the size of the fabric for the wallet is sufficiently knitted, you need to close all the loops, fold the fabric into the wallet and knit the edges with single crochets. The lid should be tied from left to right in a circular single crochet. Sew a button onto the lid of the wallet.