
DIY New Year's chest from a box. Cardboard box chest
With the onset of winter, many people experience Christmas mood. Streets, shop windows, and shops are already decorated everywhere. Charged with this mood, you want to bring a feeling of celebration into your home. In addition to the elegant Christmas tree, I would like to add something more unusual to my home. holiday decor. For example, you can make a New Year's chest for Santa Claus.
How to make a New Year's chest yourself
The blank for the chest should be cut out of a sheet of cardboard and then glued along the edges. Or take a ready-made box suitable size. To give the box the shape of a chest, you need to adjust its lid.
- To do this, you need to cut the sides out of cardboard in the shape of a semicircle (you must cut out indentations along the edges for gluing).
- Then you need to glue the semicircles onto the lid on both sides.
- Take a sheet of cardboard and glue it on top to the lid and sides. Thus, you should get a half-cylinder. To create the desired shape, it is convenient to use masking tape.
- After the chest is ready, it should be decorated. To do this, you can use decoupage, fabric, self-adhesive paper or paint.

Original ideas for a New Year's chest
Why do you even need such a chest? It could be just a New Year's decor item, a surprise gift, or just original gift packaging. The composition can also be placed on a festive table.
Attention! There are a lot of options for decoration: the main thing is to use your imagination and create. Such a cute accessory will definitely attract the attention of both household members and guests.

DIY New Year's chest: step by step
What you will need:

Making a chest is not difficult for anyone, so you can involve children in this activity. It will be very interesting for them.
On the eve of the New Year, I want to tell you how you can do it yourself various models chests for your treasures.

Unites the most simple models chests cardboard base from which the frame is glued, then either pasted over newsprint, either thick drawing paper or crumpled paper. If you have it in stock, you can cover your finished one. box pieces of suede, leather or leatherette (but it doesn’t stick well and immediately curls up). Then, at your request, either the whole thing is painted acrylic paints, either covered with fabric or decorated using decoupage technique, you can add decorative elements from papier-mâché and fur. I like it best of course leather version painted on top with acrylic and covered with gems :)
There are several options for making the base:
Can be cut out box according to the corrugated cardboard scheme - its advantage is that it bends well, but its disadvantages are that it is easily dented.

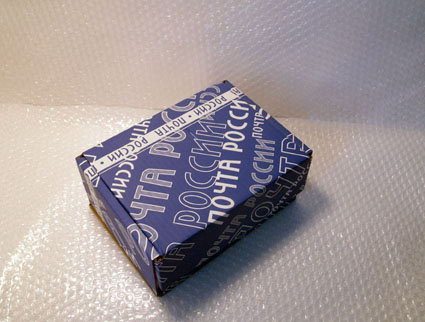
You can use a printer paper box with a lid (usually the box contains 5 packs of paper, 500 A4 sheets each) or purchase a Russian Post parcel box of the required size.

You can glue from hard cardboard, thin sheets of fiberboard or decorative plywood, but for this you will already need a jigsaw.
You can make the base - the edges of the chest from hard wire and trim it, glue it, tie it, string it with beads and seed beads, etc.


Design examples chests different techniques:
Decoupage 

Corrugated paper 

Covering with fabric and fur 


Leather 
Design options for your chest a great variety - the main thing is to make a strong frame and you can create magic chest, which will delight and delight not only household members but also guests. And especially relevant chest under a Christmas tree with a bright New Year's theme and there is always enough room for imagination. Create and delight yourself and your friends with handmade gifts. And even when moving from one place to another, and this unfortunately happens to me often, it can be used to pack furniture for Barbie and Ken, creating coziness inside :) 
Master class on making chest-origami (Origami Treasure Chest (Robin Glynn)
Surprises? Read the recommendations below and you can easily make a beautiful DIY gift box. The kids will really love that Santa Claus brought them such a fabulous chest. Create an atmosphere of magic at home or at a children's party.
Which product size to choose
A DIY New Year's chest can be made as a souvenir, for example, in the form of a keychain or magnet, or directly in the form of a functional item intended for packaging or storing gifts from Santa Claus. In such a chest, the size of a regular one gift box, it’s easy to pack sweets and small toys and place them under the Christmas tree at home for your baby. If you need an interior decoration option for a festive event in kindergarten, school or other organization, you will have to work hard and make a product the size of a box. 
Tools and materials
To make cardboard chests with your own hands, you will need the following:
- cardboard;
- sample;
- drawing tools (pencil, ruler, eraser, square, compass);
- scissors or knife (depending on the size of the object being made);
- glue or thread with an awl for connecting elements;
- decor (textured paper, fabric, braid, lace, sequins, beads, beads, etc.).
As you can see, everything you need for work can be found at home!
How to make a magic chest with your own hands using a template
If you have a finished product, for example, packaging for a sweet gift, you can use it as a blank.  To do this, unstick the seams and lay out the cardboard chest to a flat piece. Place the stencil on the cardboard and trace along the outline. If you need to make a smaller or larger chest with your own hands, just change the size of your diagram proportionally. Another way is to find a template on the Internet, print it to the desired scale and also trace it along the outline.
  Whichever template option you choose, the steps for creating the chest itself will be as follows:
- So, in front of you is a contour blank, which you transferred to cardboard for the chest in any way. Cut it out with a knife or scissors.
- Draw along the fold lines with a sharp, but not cutting object, such as a knitting needle or a non-writing point. ballpoint pen or make small indentations or cuts in a dotted pattern. This step will allow you to carefully bend the thick cardboard without creasing the material.
- Fold the flat pattern into a three-dimensional structure and glue all the seams.
- The next stage will be decoration. By the way, some elements should be attached before assembly, for example, fabric if you are going to cover the chest with it.

How to draw a sweep yourself
If you decide to make a chest with your own hands, but there is no template, you can create it entirely yourself. In essence, the object is a rectangular box with a hinged lid, the end parts of which are made in the form of semicircles. To do this, you will need to draw a bottom rectangle of the required size on cardboard, and another rectangle on each side that will form the walls of the product. Don't forget to allow for gluing allowances. If it’s difficult for you to completely imagine a chest in the form of a flat diagram, take a regular box and unfold it. Use this as a reference for the bottom of the piece.
How to make a lid
If you decide to make Santa Claus's chest with your own hands, drawing a pattern yourself, you will have to work a little on the lid of the product.  For the first time, you can create it in the form of a separate part that is glued to the box base. Work like this:
- Draw two halves of a circle with a diameter that matches the width of the lid (or base box).
- Draw circles of larger diameter around the workpieces. These will be the gluing allowances.
- Cut out the resulting two semicircles and make cuts along the allowances and bend them.
- Draw a rectangle with a width equal to the long side of the base box. The length will be somewhat more difficult to determine: you need to measure the perimeter of the arc of the resulting semicircle (without allowances) and add to it the distance for gluing to the base (back) and the allowance for the front part so that the lid overlaps.
- Draw another rectangle equal to the size of the bottom. Don't forget about the gluing allowances too.
- Cut out all prepared parts.
- Glue the elements into a three-dimensional structure and attach to the base.
How to make a chest with your own hands without glue
If you don’t understand at all how to assemble a three-dimensional box from a flat diagram, where to make allowances, and ready-made template no, you can use this method of work, where glue is only needed to decorate the product.  Work like this:
- Draw two identical rectangles for the base of the box and the lid.
- Make two identical parts of the side parts of the base (chest walls).
- Make two semicircles for the lid, as well as a large rectangle to make the arcuate surface. Determine the dimensions yourself depending on what kind of chest you are making.
- Cut out all the blanks. Decorate them with fabric, paint or designer paper at this stage.
- Make holes along those sides of the parts that will be connected to adjacent ones using an awl or a large needle at a distance of a few millimeters from the edge so that the workpiece does not tear (the distance from the edge depends on the thickness of the cardboard). Adjacent parts should have the same number of holes at equal distances.
- Take threads that match the color of the future chest or contrasting ones and use a crochet hook or needle to connect the parts of the product. The same can be done even with the help of decorative braid or narrow satin ribbon, only the holes will need to be made larger in diameter.
In this way, even those who find it difficult to understand the construction of box drawings can make a Santa Claus chest with their own hands. The only drawback of this method is that it will take a lot of time to make holes around the perimeter of the workpieces and sew them together or tie them with threads.
Product decoration
So, you have seen that you can make cardboard chests with your own hands in different ways, in this case, if a non-decorative base material is used, it can be easily covered with fabric or beautiful paper. If the product is glued together, then decoration can be done both before this stage and at the end of the work.  If you make a New Year's chest with your own hands by sewing together elements, you need to cover it with fabric first in order to pierce holes in all layers at once. In addition to fabric and paper, the following decoration methods are suitable:
- glue a sequin pattern around the perimeter of the sides;
- lay out a pattern of beads in the form of frosty monograms;
- use decoupage technique instead of covering with fabric;
- apply voluminous jewelry from satin ribbons, quilling elements, artificial snow, applications in the form of snowflakes and other thematic objects.

As you can see, you can make a New Year's chest with your own hands in different ways. Choose your favorite design and decor option. Create spectacular accessories for the holiday!
Hello! Working on this box gave me great pleasure. After rummaging around in my piggy bank, I found several bobbins (from braid) that even had a bottom. The first box I made from these bobbins was, of course, a New Year's box with Santa Claus. If you have reels and want to do something similar, then you will probably find my detailed tutorial useful. Watch, get inspired and create!


For the work, I needed a spool of braid with a diameter of 8.7 cm, a height of 4.5 cm, cardboard, a pencil or pen, scissors, a red floral mesh with white flies (which immediately reminded me of snow), red silk fabric, a piece of red satin ribbon , needle and thread, braid with snowflakes, Santa Claus made of soft fabric, silver bow, rhinestones and star-shaped stickers.


First I outlined the bottom of the bobbin and cut it out. I covered the cut out circle with a piece of red fabric and floral mesh and glued it with silicone gun glue. The bottom was already in the reel, so I am only decorating the outside. I put them under the press (books). Next, I cover the inner bottom of the cardboard box with fabric (red silk fabric and floral mesh on top), but add another layer of foam rubber. Then I cut out the side inner strip of the floral mesh and attach it with glue. I glue a red satin ribbon on top and then insert the bottom. The inside of the box is ready.


I cut out several layers of cardboard and foam rubber for the lid, and make it tall. I cover all the layers of the lid with fabric, gather them together with a needle and thread and attach the red one (the inside of the lid) with glue.


Every family is preparing for the new year. But not every room has free space for big Christmas tree, but you really want the holiday to be present in all corners of the house. This composition will look great both on the bedside table and on the served table. Creating such a chest will not take much time.
Materials for work:
- chest or decorated box;
- artificial spruce branches;
- cones;
- white structural paste;
- tool for applying paste;
- silicone gun;
- beautiful ribbon;
- decorations.


Work progress.
Apply a structural paste (preferably with large granules) to the finished cones. If there is no factory mixture, then it can be easily replaced with colored semolina. “Snowing” should only be done around the edges, without trying to go deeper. In this way we decorate all the prepared gifts of the forest.


Branches of artificial spruce or pine can also be lightly covered with “snow”. We glue the smallest details onto some branches with a glue gun.


Cut the shiny ribbon into strips of 25 - 30 cm. From each cut, assemble a small skirt for the cone. IN this option– floral tape on a wire, you just need to collect the material and connect the ends.

On a regular ribbon, the same thing is done with a needle and thread. Attach the finished frills with glue to the base of the cones.

Place decorated greens at the bottom of the chest.

Glue a 40-50 cm strip of tape along one edge.

Place the dressed pieces on top.


For decoration, choose bright small flowers or fruit bouquets.

You can also hang an electric garland. The New Year's chest is ready.


This is a very light and transportable decoration. Perfect for New Year and Christmas holidays. You can decorate your entire home with such compositions. If this ikebana is planned for a home with small children, then, as an option, you can hang small candies instead of decorations.