
Crafts from egg cells. DIY egg crafts - original step-by-step master classes with photo examples
It would seem, what is an egg tray? An unpresentable box that can be thrown away or, at best, recycled. But they didn’t guess right! For people with a creative soul and endless imagination, this piece of cardboard is an almost ideal creative material from which you can make so many useful and beautiful things. Do you want to see which ones? Then read on and you will find out what you can make from egg trays with your own hands.
Popular egg tray crafts
Egg trays consist of thick cardboard, which easily changes shape and lends itself well to coloring. Thanks to this, you can make an endless number of things from it. Most often this is:
- bouquets of flowers
- elegant wreaths
- holiday garlands
- wall panels
- photo frames
- and children's toys
Making them is not as difficult as it seems. Especially if you follow the tips experienced craftsmen and step-by-step photo lessons.
Flowers and bouquets
Making a flower from an egg tray is not an easy task at first glance. But in reality it is quite doable. All you need for this is: decide what kind of flower it should be, select the necessary layout for cutting out the petals and start cutting them out. Then connect each of them to each other, glue them in the desired position and decorate them with gouache or the same watercolor.
Violet brachycomas
So, for example, you can easily make a bouquet of purple flowers from paper egg trays, reminiscent of brachycoma. For this you will need:
- egg tray
- piece pistils, stamens and stems
- sharp awl
- scissors
- paints
- small brush

Work progress:
- Cut out as many cells from the paper tray as needed to create flowers. To make one flower you will need one deep round cell.
- Then, in each of them, cut out 8 oval oblong-shaped petals with scissors.
- Decorate each of them with purple or maroon paint. Make the middle bright yellow.
- Connect the stamens together, put them on the stem and, piercing a thin hole in the middle of the flower with a sharp awl, fasten all its parts together. For reliability, they can be glued together.
- In this way, make as many flowers as you need. Gather together in beautiful bouquet and put it in a vase.
Such a decoration will bring the necessary brightness to the surrounding interior, and will remind you of warm summer and colorful flowers for a long time.
Rose assembly technique
If you want to make a lush rose out of thick paper, you will need the following guide:

These roses are perfect for decorating a photo frame, and will also be an excellent addition to any wreath, garland or other interior item that may contain flowers.
A practical example of making paper roses:
Decorative flowerpot
Along with individual bouquets, you can easily build a decorative flowerpot from egg trays, which can be placed on a window or placed somewhere in the dining room or living room.

The principle of its creation, in fact, is no different from the methods described above. The only thing that may differ is how the entire structure is assembled together. So, for example, to make a flower with oblong petals, you need:
- Cut the cells from the tray so that they have long protruding edges.
- Give the petals a sharp, elongated shape.
- Paint with a brush in the chosen color.
- Cut out wide heart-shaped sheets of cardboard.
- Glue them to the stem (you can twist them from wire or buy ready-made ones at a handmade goods store).
- Assemble the flower by attaching its base to the stem.
- Place all the flowers in a special flowerpot base, which can be made from the same egg tray. The latter must be pre-painted green. If you don’t have a free tray at hand, place the composition in a flower pot.
- Decorate the attachment point with piece grass or sisal.
Now the decorative flowerpot is completely ready to decorate your windowsill with its extraordinary appearance.

Other ideas for making decorative items from egg trays
In addition to flower arrangements, flowers from egg trays are great for:
- mirror decorations,

- decorating commemorative photo frames,

- assembling holiday wreaths

— and creating small personalized banquet cards decorated with flowers

But this is not the limit of fantasy for real handmade masters. In addition to decorative interior items, they offer to make from egg trays beautiful toys for children.
Without much difficulty, you can assemble a car, a dinosaur or a small chicken from them. The main thing is to show your imagination, and even better, to involve children in their creation, who will be extremely interested in participating in such exciting activity, like cutting out paper and gluing something unusual.

Above we described only the most common ideas about what can be made from egg trays. In fact, they can be used in a dozen other different ways, some of which come to mind completely spontaneously. Would you like to use them to decorate your home interior? And if so, how?
Read also


The practical use of egg trays in the garden will solve the problem of garbage and provide useful devices that will help the process of growing crops, caring for plants, and organizing a home nursery. Cardboard and plastic containers are suitable for reuse. Don't throw away egg cartons to put them to good use.
Stencil for planting
Square egg cartons have convenient sizes suitable for organizing a vegetable garden. Make a stencil from an egg tray for planting root vegetables or other crops. Apply the device following the algorithm:
- start preparing the soil substrate for the carrot bed 14 days before sowing;
- dig up the ground to a depth of up to 30 cm;
- add rotted compost, rotted mullein or humus at the rate of 5 kg of organic matter per 1 sq. m;
- add loam, river sand;
- organize a narrow ridge up to 60 cm wide without a slope;
- 1 day before sowing, pour plenty of settled water onto the planting area so that the soil is moistened 15 cm deep;
- loosen the planting surface with a rake;
- apply the egg carton with force to the loose soil substrate, leaving imprints;
- process the entire ridge in this way;
- Place seeding material (seeds, bulbs, seedlings) into the small depressions formed.
Using an egg carton, you can easily outline your planned plantings. The space between the holes formed by the egg substrate will be enough for the full growth and development of greenery, flowers, some varieties of root vegetables, onions, etc.
Compact stencil nursery in open ground

An egg container can serve as a practical container for growing seedlings. To obtain the device, use substrates square shape from cardboard. Make a convenient device for sowing carrots, radishes, basil, flowers, etc. without thinning.
Make a nursery bed in the following sequence:
- collect several cardboard trays;
- cut off the bottoms of the protruding cells;
- Fertilize and dig up the bed;
- Water the landing area generously;
- loosen the surface;
- lay it on the ridge and press it down;
- pour 1-2 processed seeds into each cell;
- bury the crops with a layer of soil along with the boxes.
Important!
Using egg trays in the garden is safe due to the environmental friendliness of the material from which the container is made.
Using an egg carton will allow you to rationally use seed, obtain proper plantings without weeds, eliminate the stage of thinning seedlings, and ensure the preservation of moisture inside the substrate.
Fruit protection

A number of varieties of tomato or cucumber bushes produce their fruits close to the ground. When tomatoes come into contact with the soil, they rot, are susceptible to being eaten by insects, become dirty, and are vulnerable to diseases. Using egg trays, create devices that prevent vegetables from coming into contact with the ground.
Choose one of the ways to organize the protection of ripening vegetables:
- mulching between rows. Cut cardboard into strips or place containers between planting rows. The fruits will fall to the surface of the packages. Weeds will not grow through the mulch layer; moisture will remain inside the soil;
- Place the container under individual hanging fruits. The pouring vegetable will not come into contact with the earthen surface and will remain clean.
The use of egg trays to protect plant fruits not only prevents contact of ripening vegetables with the soil substrate, but also maintains soil moisture and prevents the growth of bushes and the germination of weeds.
Home nursery
Equip egg containers into convenient devices for growing onion feathers. For a home nursery, you will need a tray or egg container made of plastic.
Make a homemade device using the following algorithm:
- place a pallet or plastic egg container on the windowsill;
- cut blanks from cardboard trays to the size of the lower base;
- cut off the bottoms of the protruding compartments;
- insert the cut segments into the lower tier so that the holes touch the bottom;
- pour water into the nursery;
- Place the prepared onions in the cells.
After 5-7 days, the onion will take root downwards and will receive nutrition from the water, and feather growth will begin from above. Add liquid regularly to keep the root system hydrated.
Protective supports for strawberries
Ripening berries on strawberry bushes fall to the ground under their own weight, where they can be damaged by rodents, caterpillars, and susceptible to disease. Contaminated ripe fruits are difficult to wash.
Make protective supports to protect the berry harvest:
- in the cardboard square substrates, cut a hole in the center with a diameter of 20 cm or another size so that the bush fits into the hole. Carefully place the device on the strawberry, placing the ripening berries on the protective material;
- plastic containers cut into two halves. Lay the strawberry bushes with blanks so that the ripening fruits fall onto the substrate.
Homemade protection of strawberries from contamination, eating by insects, and the formation of gray rot will protect your harvest, become an obstacle to the growth of weeds, and maintain moisture under the plantings.
Preparing beds after winter
Cardboard egg containers can be used for compost, warming frozen soil after a winter in greenhouses. Use the container to organize compost heating and grow early greens, radishes, early-ripening varieties of vegetables and flowers.
Carry out activities to organize warm beds in greenhouse structures in the following sequence:
- lay on frozen ground egg trays;
- Place an even layer of mullein, old hay, fallen leaves, and compost on top;
- cover the organic matter with soil substrate;
- Sprinkle the planting generously with heated water;
- treat the soil with a solution that protects against diseases (for example, “Baikal”).
In a multi-layer bed with a large amount of organic matter and substrates that protect from frozen ground, an intensive process of rotting will begin, accompanied by the release of heat. 14 days after organizing a warm ridge, you can sow greens, seedlings, root crops, and early ripening vegetables.
Egg trays in the garden

Cardboard egg containers can serve as an excellent mulch component to protect berry crops. The substrates protect against weed germination, evaporation of soil moisture, freezing of the root system of fruit and berry bushes, and contact of ripening berries with the soil.
- Apply the egg container as follows:
- lay trays around raspberry, currant, and gooseberry bushes;
- cover planting perennial flowers with cardboard containers for the winter;
- Cover the strawberry plantings with mats.
Well-rotted cardboard is an excellent ingredient in the compost pile and a protective device around the plant.
Country crafts

You can use cardboard and plastic packaging to lay a garden path, build a simple bird feeder, or grow seedlings. From cardboard moistened with an aqueous adhesive solution, a pliable material is made from which you can sculpt various crafts and figures using papier-mâché technology.
For country coziness, create:
- garden birds. Cut out cells from cardboard containers, paint them with watercolors or gouache, and varnish them. Decorative birds can be placed in a feeder or mounted on the branches of fruit trees;
- homemade flowers. Soak the cardboard trays in warm water, squeeze out the raw materials, add PVA glue, and achieve a homogeneous mass. On wire frame mold pieces of raw material to make a flower stem. From the cardboard composition, fashion the core of the flower and petals. Make classic daisies, create bells, sculpt roses. Attach the parts with thermal paste or stable adhesive. Dry the products thoroughly, paint different colors gouache or acrylic, cover with clear varnish. Install crafts on the lawn, next to garden figures, or make an impromptu flower bed;
- garden hedgehogs. Mix the cardboard mixture to make papier-mâché. Sculpt the body, muzzle, and needles. Carefully glue the parts when attaching them to each other. Decorate the craft with paints, depicting eyes, mustache, mouth. Bring the figurine to life with a homemade apple. If desired, arrange lighting inside the hedgehog using an LED light bulb. Cover the dried composition with a layer of colorless varnish;
- flower garland. Make flowers in the form of roses or bells from cardboard mass, softened with water and glue. Provide a hole for placing the lighting fixture. Paint and varnish the finished dried bud models. Elegant craft, protected by a varnish composition, is not afraid of moisture. You can decorate your veranda, terrace, gazebo with homemade lamps;
- family photo frames. Decorate regular picture frames with papier-mâché from egg containers, paint them, make memorable inscriptions, varnish them, and place images of loved ones.
The practical use of egg trays in the garden will make the work of the summer resident easier and will make it possible to make useful devices for growing crops in beds, on windowsills, and in greenhouses. Using papier-mâché based on cardboard containers, create various crafts for arranging country house comfort.
Every child loves to tinker, creating original crafts using for these purposes natural materials. Of course, there is a logical explanation for this, for example, first of all, it should be noted that it is really more pleasant to work with them, they are accessible, which is important. For these purposes, you can use both cones and pebbles, certain plants, but also, of course, empty eggs, eggshells, creating a real work of art.
On the Internet, you can find many photos of egg crafts, which will allow parents to choose exactly the option that they will try to implement with their child. There is nothing complicated about this, which means that with a little effort, you can always achieve the desired result.

As a rule, eggs actually make original crafts, for example, a parrot or a pig. As for the main material for such an activity, you can always find it in the refrigerator.

Craft “Chicken from an egg”. Peculiarities
If you want to make a craft from an egg with your own hands, then know that there is nothing complicated here; you will need to take into account some useful recommendations.
First of all, you should prepare several raw eggs, yellow knitting threads, PVA glue, but also, of course, wooden skewers.


An egg can be pierced without much difficulty; for this purpose, a thin needle is used, which should be pierced first one side, then the other, blowing out the liquid contents.

Next, you will need to cut the threads, doing this in a small way, lubricating the egg with glue, using a brush, and then sprinkle it on all sides with various threads, and you need to try to gently press them, then they will be able to stick well.

From the bottom of the egg, into the hole that you previously prepared, you need to carefully insert a skewer; if the hole is large, then try to coat the joint with glue, this will ensure that the chicken can sit firmly on the skewer. The scheme for beginners will definitely help you avoid common mistakes, creating a craft without problems and difficulties.

Do not forget that you will definitely need to glue the eyes of the chickens - beads, beaks made of red cardboard. This is the final stage of making this craft, which means you will definitely cope with this work.

It is worth noting that you can always decorate the Easter table or children's room with such chickens. Such simple instructions, will always allow you to easily implement such ideas, you can’t even doubt it.

Crafts from eggs for little ones
As a rule, none of the children will be able to refuse such an activity, since it is interesting and tempting. Therefore, parents must provide him with such an opportunity, especially since all the materials necessary for this work are at hand.


Parents can show a master class to their child, who will definitely fall in love with this process, and in the future it will turn into a hobby.

At the very beginning, you need to cook the paste, after which you pour the cereal into one plate and pour it into another plate. Also, the parents’ task is to show the baby how to hold the egg correctly.

Semolina is known to be white, so you can always add food coloring, glitter, but this is not necessary. As for decorating, you can do it in different ways, it all depends on your taste, preferences, and wishes of the baby.

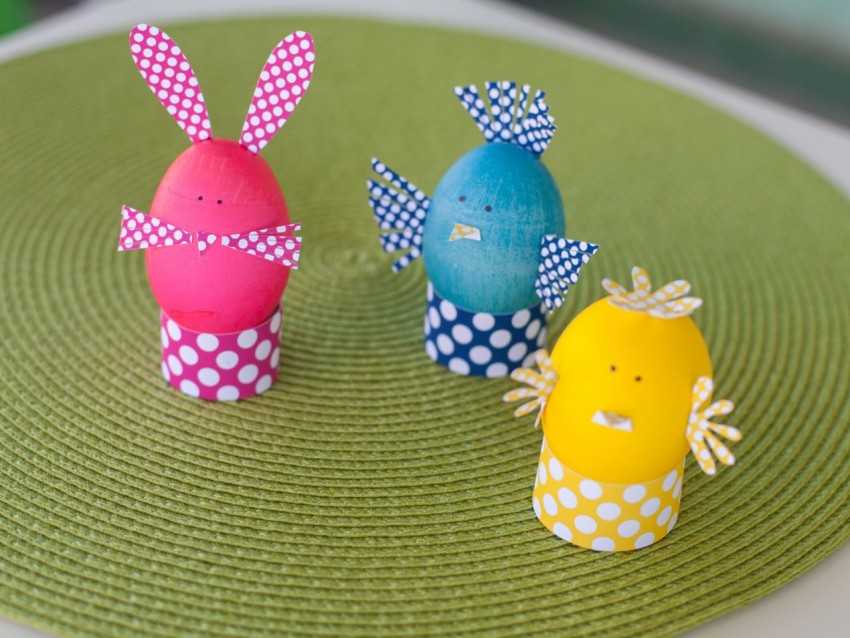
To please children, you can turn on your imagination and draw, for example, funny faces on eggshells, or come up with an interesting fairy tale about Easter people made from eggs. In any case, crafts made from eggs always look interesting, original and unusual.

To make the child’s wishes come true, you need to take into account all the simple recommendations that were mentioned, and then the egg craft for children will be made in a short period of time, and you will be able to please your baby. To create it, no expensive or supernatural materials are required; they are all at hand.


If you teach a child to make crafts from eggs from childhood, then it is possible that in the future he will engage in some other creative activity.


Photos of egg crafts


From such a seemingly inconspicuous-looking waste material, like egg trays, you can make very beautiful objects. Once you make one craft, you will stop throwing egg trays in the trash. The first thing you can try to do with your children is tulips. By cutting the tray into cells, you will get an almost finished tulip; all that remains is to slightly correct its shape, paint it and make a stem if necessary.
For painting it is better to use acrylic-based paints. Flowers without stems are used to decorate home furnishings, cards, invitations, etc.

Roses from their trays
You can also make roses. How to make a rose craft from a tray with your own hands? The answer is very simple. To do this you need to prepare:
- egg cartons;
- scissors;
- green corrugated paper;
- paints and brush;
- glue or glue gun.


Step 1. Divide the tray into cells (cones) using scissors. Make four cuts on each piece. The result is a blank of four petals. For one flower you need four of them.

Step 2. Open the cone and process the edges of the petals: give them a rounded shape, cutting off sharp corners. Do this with all the blanks.

Step 3. Make cuts on each part towards the center, this will simplify the process of gluing the flower. Using a wooden stick or the handle of a brush, you can curl the edges of each workpiece.

Step 4. Paint the blanks in any color you like. To add naturalness, the centers of the petals can be painted with a lighter tone. Allow the workpiece to dry.

Step 5. Gently bend the tips of two opposite petals in half and glue them together as if the bud is closed. Glue another pair of petals to this base.

Step 6. Do the same with the second and third workpiece. And we cut the fourth into separate petals and glue them to the resulting bud. The master class on making roses from trays is completed.

With the resulting roses you can decorate a ready-made photo frame or create your own. In the center of a rectangular cardboard base you need to glue a photo, leaving a few centimeters at the edges. Empty edges are filled with flowers. You can make a wreath for the door in the same way.


Crafts with children
Paper egg cartons are great for crafts with kids. You don’t mind throwing them away if things don’t work out. But this activity develops perseverance and stimulates creative imagination.

An interesting option for crafts with young children is a caterpillar (centipede). To make it, you need to cut a row of 5-6 cells from the tray, paint it, decorate it with ribbons and threads. Antennae and paws can be made from chenille wire. A little imagination, bright colors and the toy is ready.


For those who like to draw, you can make a box for crayons. If you color the cells according to the colors of the crayons, you can kill two birds with one stone. There will be a place to store crayons, as well as the ability to sort them by color, while developing logical thinking in children.

The cell (cone) from the tray serves as the basis for creating various animals, birds and insects. You can make a penguin, hare, whale, turtle, ladybug, chicken and much more that your imagination suggests.


Everything ingenious is simple. A tray for a dozen eggs is a ready-made base for a ship. We install the mast, sail and go!

From an egg carton you can make original boxes for jewelry or handicrafts. The boxes are first coated with white acrylic paint inside and outside. Then they can be painted and covered with decoupage napkins.

Papier-mâché crafts
Many people use trays to create crafts using the papier-mâché technique. The boxes are crushed, soaked in water, mixed with glue (PVA, wallpaper, paste). It makes an excellent mass for modeling. Having collected a large number of trays, you can make a figure for the garden, etc.


On the Internet you can find a large number of photographs of crafts made from egg trays. They can be used as:

- feeders;
- bouquet of flowers;
- containers for growing seedlings;
- boxes and much more.

You won't have the urge to throw it away anymore. cardboard boxes from under the eggs into the trash can. They can and should be used for creativity. Create beauty with your own hands!

Photos of crafts from egg trays


It is important to understand what craft needs to be done. If it is planned from a whole egg, then difficulties in work must be avoided. To do this, you need to carefully remove the contents from the egg before starting. This cannot be done without the help of an adult. Why? The answer is simple. The object with which the egg cocoon will be pierced is sharp. A eggshell so fragile that the shell can be damaged.
Using a sharp awl or gypsy needle, pierce the egg on both sides - top and bottom. The top hole should be smaller than the bottom. This is necessary so that the contents can easily pour out of the bottom hole using blowing. This method involves using a medical syringe, with which you can blow out the white and yolk in a matter of seconds.

Clue! The egg white and yolk do not have to be thrown away. It can be used for a variety of purposes, from cooking to a hair facial mask.

The shells must be washed well and dried for further use. This will take some time. Therefore, such preparations must be made in advance. Once you are sure that the egg is dry, let's get to work.

Simple masterpieces
It has long been no secret that eggs and shells can be used to create not only various fairy-tale characters, but also beautiful mosaic paintings. And what beautiful flowers come from whole eggs! As soon as you want to make a craft, various tailed birds, wild and domestic animals are born. The embodiment of fantasy is limitless.

To make crafts you will need a standard set:
- empty egg (quantity as desired),
- paints (gouache or watercolor),
- watercolor brush,
- craft paper (multi-colored),
- PVA glue,
- glue brush,
- good lighting,
- stand and place for drying,
- colored plasticine.

Pineapple
We make a beautiful miniature pineapple step by step:
- Take the egg shell and paint it yellow using a brush and paints.
- Dry the workpiece and apply black paint in stripes - crosswise, in the shape of diamonds. With this ornament we will show the “scales” of the fruit.
- Let the paints dry, and then, in each rhombus, draw another rhombus, but of a smaller size - orange. This is to give the pineapple a more natural color.
- From a pile of colored paper, choose a green color and cut out the top of the pineapple in the shape of leaves. Glue to the top of the fruit.
Mini pineapple is ready!

Carrot
To make carrots, everything is done according to the pineapple principle, but with different colors:
- Paint the egg orange using a brush and paints.
- Dry the workpiece well and apply vertical black marks in a chaotic order from top to bottom.
- Dry the paints, then use green plasticine to make tops on top of the carrots.
- Cover the work with a layer of PVA glue and let it dry.
Delicious carrots are ready!

Clue! When PVA glue dries, it forms a protective shell for the finished work, which you can safely touch with your hands.

It is not forbidden to make any fruits or vegetables from empty eggs, paints and plasticine with paper. Don't limit yourself to just tasty treats.

You can try to make a winged airplane, a funny face with a long plasticine nose, or even a beautiful Christmas tree toy on a thread. The main thing is to have a little patience, perseverance and a good mood.

Mosaic painting
There are many variations of eggs and shells. If you can create masterpieces from whole eggs, then why can’t you make a beautiful thing from a broken egg? Of course you can!

We will need:
- eggshell,
- PVA glue,
- patterned napkin (decoration at your discretion),
- glue brush,
- cardboard,
- frame (optional).

Glue the broken shell onto the cardboard. Then, after drying, apply a thin layer of PVA glue to the shell with a brush and lay a single-layer napkin with a pattern on it. Apply glue to the surface of the napkin with a brush to completely secure it. Our picture should dry well. The finished product awaits us with a mosaic picture in the decoupage style. It will perfectly decorate the most modest corner in any room.

But for complete harmony, you can create another interior item. From plastic bottle Carefully cut off the top and treat the entire surface from the outside with plasticine. Next, carefully lay out the broken shells at an equal distance from each other. You will get an extraordinary flower vase. Or a stand for pens and pencils. Next to the mosaic picture they will harmoniously complement the interior.

Crafts made from eggs and shells can be used not only as exhibits for an exhibition. They can be used to decorate festive tables, they can be given to each other for the holidays, they can be used to decorate a room, and even Christmas tree! And there's nothing better decoration and handmade gifts.