Topiary from satin ribbons 5 cm. We make beautiful topiaries with our own hands
DIY topiary for a little fashionista for her birthday.
Master class with step-by-step photos. Tree of happiness “Pink roses” as a gift with your own hands.
teacher of additional education Novichkova Tamara Aleksandrovna MBU DO Lesnovsky House of Children's Creativity.
Description: The master class is intended for children of high school age, additional education teachers, technology teachers, parents and all those who like to do handicrafts and make gifts with their own hands.
Purpose: a topiary or a tree of happiness will serve as a wonderful decoration for the interior and at the same time will become one of the best options for a hand-made gift. Even novice needlewomen can make this small decorative rose tree. This skill is not difficult to learn. The main thing would be a sincere desire to please your loved ones and friends.
Target: making a tree of happiness from satin ribbons.
Tasks:
- learn how to make roses from satin ribbons;
- learn how to make topiary, decorating it with satin roses;
- strengthen skills in working with available materials;
- develop creative abilities, aesthetic taste;
- cultivate diligence and accuracy when doing work.
Materials and tools:
Pink ribbons of different shades and different widths;
- needle, scissors;
- pink threads;
- pink and pearl beads;
- mirror.

- thermo gun;
- stand for topiary (flower pot);
- sticks for the barrel;
- sisal;
- patch;

- a piece of polystyrene foam;
- alabaster, water;
- a jar for diluting alabaster, a spoon;

Step-by-step execution of the craft.
The main stage: making roses from satin ribbons.For my topiary, I took pink ribbons. Since this tree of happiness will belong to a little girl. You can take any width of the ribbons: from 2 cm to 5 cm. This will depend on how big you want your roses to be. If you are just starting to work with satin ribbons, it is better to take a wide ribbon. It will be more convenient for you to hold it in your hands and form rose petals. Ribbon roses are not made as quickly as we think. It is necessary to master the technique of making them and do several trials. And having learned to “manage” the ribbon, you can easily make beautiful buds and roses. A rose is made from a whole piece of ribbon, and, having obtained the desired size of the flower, cut the ribbon. You can immediately cut the ribbon into strips, knowing that on average it takes 35 - 40 cm for one rose.
Let's get to work. Take a ribbon and a needle and thread to match the ribbon. We hold the tape with our left hand, and with our right hand we bend the top corner of the tape down at an angle of 90 degrees.

We twist the ribbon, making the middle of the rose, and sew the bottom with a few stitches.

Bend the ribbon away from you and wrap the folded ribbon around the middle. Carefully hem with stitches. This is how the bud turned out.


Bend the ribbon back and down again, twist the bud, making a rose petal. We hem the bottom.

We repeat the action, making more and more petals. Don't forget to secure the tape at the bottom so that the petals keep their shape well.


Cut the ribbon and sew the cut end of the ribbon. This is what the flower looks like from the reverse side.


The rose is ready! One, two, three... The flowers turn out beautiful, delicate, airy. We admired it and continue to work patiently, showing accuracy and diligence. This was my first time making topiary from satin roses, so I didn’t know how many flowers to make. I got carried away with the work and this is the result! 20 beautiful roses of different shades lie on the table.


Second stage: preparation of the crown and trunk.
For the trunk we need 2 sticks. I prepare them for future use in the summer. I find branches of a bizarre, twisting shape. I remove the bark, peel it and dry it in the sun. We connect two sticks together with adhesive tape. This needs to be done so that they look beautiful and complement each other. Our tree will have such an unusual trunk.

For the crown I took a foam ball. If you can’t buy it, make a ball out of old newspapers, wrap it with thread, and cover the top layer with white paper napkins. Make a hole in the ball, add glue and insert a stick. The ball is now firmly in place.

We secure the end of the pink ribbon with glue and wrap it around the barrel. The ribbon should overlap. Add glue here and there to prevent the ribbon from sliding down the stick.

Wrap the ribbon around the second stick. It will become a stand for the mirror.


For contrast and to add brightness to the trunk, we wrap it with a narrow, bright pink ribbon. The trunk and crown are ready.

Third stage: installation of the tree.
We take a beautiful pot, insert a piece of polystyrene foam into it, make a hole in it and install the topiary blank. Polystyrene foam will help save the pot from cracking when filled with alabaster.


We dilute the alabaster to thick sour cream and carefully place it in the pot with a spoon, leveling the surface. We wait until it hardens completely.


Stage four: decorating the crown with flowers.
Using a heat gun, we begin gluing the roses from below.


We try to glue the roses, alternating them by color. Rose to rose and our ball gradually turns into one big pink flower.


It is impossible to count the number of roses needed for the job. So I had to do three more and only then continue my work. I glue them to the top of the ball and the crown is ready!


To add elegance to the topiary, glue large pearl beads to the rose petals, and small pink beads to the trunk.


Decorate the surface of the pot with sisal and beads.

We glue one rose decorated with beads to another tree trunk.

Well, now let's prepare a surprise for our fashionista. This is a mirror with a picture of a beautiful girl. And what’s interesting is that if you turn the mirror a little, the girl opens and closes her eyes, as if she’s blinking at you. We tie a ribbon to the mirror.


We hang a mirror and admire our creation.

Delicate ribbon topiary: 30 photo ideas for a romantic gift
Ribbon topiary is a stylish interior decor or a delicate handmade gift Ribbon topiaries are one of the most popular hand-made gifts. More than one master class is devoted to how to create a beautiful tree with such an elegant, cute crown with your own hands. Flowers are usually made from ribbons, often roses, which become the main detail of the topiary.
Flowers from ribbons for topiary: master class No. 1
In order for the crown to be a scattering of delicate roses, you need to make at least ten such flowers.
The width of the ribbon for the flower must be at least 2.5 cm, length – 20 cm. You can choose any color
Making roses from ribbons step by step:
- Take the ribbon so that the reverse side is facing you;
- Start twisting the left edge in the direction from left to right, getting a column;
- Twist almost to the end, so that a small triangle with a side of 2 cm remains;
- Now you need to twist the rose itself, hold the base of the flower with your left hand, and turn the ribbon away from you with your right hand, while bending it;
- With your left hand, with your thumb and forefinger, hold the rose by the base, twist it counterclockwise, and with your right hand bend the upper edge of the ribbons away from you;
- When the rose is formed, bend the end of the ribbon and connect it to the base;
Hold both ends of the ribbon with your left hand, thumb and forefinger, wrap the base tightly with thread and tie
In this case, the main thing is skill; the first couple of roses with your own hands may not turn out right away, but then the work will resemble a conveyor belt.
How to make roses for topiary (MK video)
DIY topiary made from ribbons: flowers, master class No. 2
You can also make flowers with petals facing out, like a chamomile. If you are making topiary from ribbons for some joyful event, perhaps for the birthday of a child or teenage girl, this master class will be just in time.
Great idea - a topiary with such flowers for the teacher, where all the guys from the class made a flower
Instructions with step-by-step tips:
- Take satin ribbons of different colors, you can even have a pattern;
- Cut the tape into equal lengths;
- You can make the base of a flower from two felt circles;
- Bend one piece of ribbon in half, and insert the two open ends into the middle between the felt circles;
- Do this with each petal, and you can fix it in the felt core using a heat gun or simply stitch it;
- The petals can be multi-colored or plain, it all depends on what kind of topiary you ultimately want to get.
Experiment with the width of the ribbon and the core; it can be large, or maybe very miniature. The core can be a bead, a button, a glass bead, etc.
An alternative MK will show how else you can make flowers for topiary.
Flowers from ribbons for topiary (photo master class step by step)
For the flower we will need ribbons of two colors 25 and 50 mm wide, rhinestones, felt, glue, thread, needle, scissors, lighter
We cut the ribbons into equal rectangles and trim the edges with a lighter. To form a petal, bend the edge of the tape, as shown in the figure, then bend the tip of the bent edge back. We do the same on the other side
We connect and fix the edges with thread. We will need quite a lot of such elements
We form a rose from the petals and glue it to a felt base.
Fold a piece of ribbon of a different color in half, cut it diagonally, and connect the edges with a lighter.
We connect the structure with glue; a folded petal can be fixed in one of the elements
We decorate the flower at our discretion. Decor for topiary is ready
Such a flower can become a bright highlight in your topiary; the remaining elements can be made simpler.
Ribbon topiary: how to make a sunflower
This MK also involves many variations. Most often it is a combination of materials, such as ribbons and coffee beans. This DIY option is probably the most popular.
It's not that difficult to make. You will need a yellow satin ribbon that is wide enough. From it you must cut out at least 20 identical petals. To prevent the fabric from falling off, it will have to be melted over a flame, but only together with the fastenings.
To decorate the center of your sunflower, you can use unhulled seeds, coffee beans or the same ribbons
The fact is that you are not just cutting out oval petals, everything is a little more tricky.
To make a sunflower petal you need:
- Take a piece 15 cm long and bend it in half;
- Bend it so that when you connect the ends you get a loop;
- When melted, the ends will not only not crumble, they will also be held together.
In order for a sunflower to be lush and beautiful, there must be two rows of petals - upper and lower
You make the core with your own hands from coffee beans. You can glue them onto some kind of durable base like felt or regular cardboard.
DIY sunflower made from ribbons (MK video)
Ribbon topiary: master class from start to finish
So, it's time to use flower blanks and finally make this souvenir flowering tree.
Having collected all the materials together, you can start by making the base for the crown. Let's say you decide not to make this base ball with your own hands, but use a foam blank. Great, save time. But if you don’t find such a blank, take the most ordinary newspapers, threads and glue. Make a ball of newspaper, weigh it down with glue, and wrap it with thread until it looks like a ball. The base is ready!
Also, an excellent base for topiary of a suitable size can be made from macroflex
- The newspaper ball needs to be painted to match the color of your roses, daisies, etc.;
- In one of the places of the ball, make a hole for the barrel;
- You can insert the trunk into the ball immediately, fix the branch or stick with hot glue;
- Hold the barrel in the ball for a while, do not let go until it “grabs” well;
- Now this entire structure can be decorated - wrap the trunk with satin ribbon or decorative braid, without deviating from the general color scheme;
- Fix the ends of the tape or braid with glue;
- The time has come to attach the flowers, hot glue and a hot glue gun will help you do this carefully, attach so that the gaps are as invisible as possible;
- The result is a trunk with a crown that needs to be planted somewhere;
- You can buy a beautiful flowerpot at a flower shop, and you won’t have to do anything yourself;
- You can decorate any container - wrap a cup or glass with lace ribbons or crepe paper, paint it with acrylic paints, wrap it with knitting threads to match the crown, etc.;
- Now pour the gypsum solution into the pot and lower the tree there, hold until it stands firmly and evenly in the plaster;
- All that remains is the finishing decor - decorate the top layer of plaster with transparent artificial stones, which shimmer so beautifully in the sun.
A topiary pot can be decorated with any decor you have on hand. It can be textiles, twine, corrugation and much more.
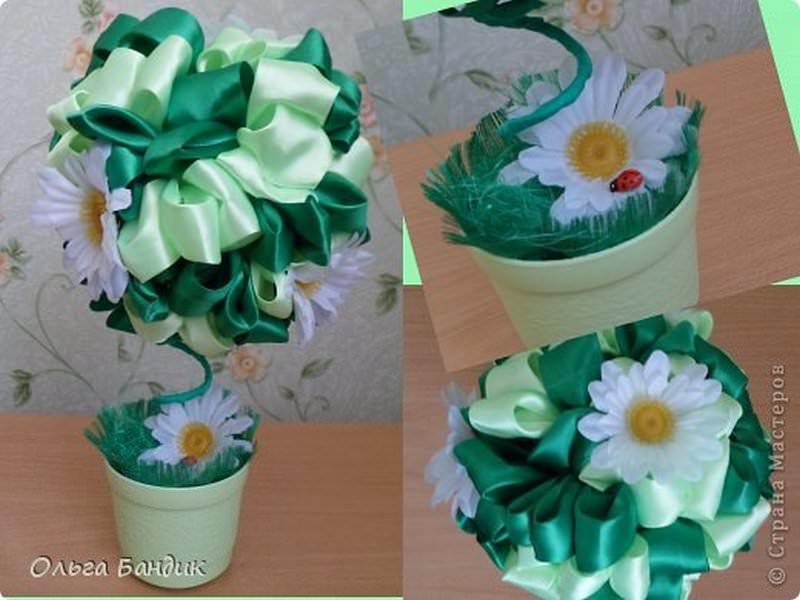
You can plant a figurine of a ladybug or a butterfly on one of the flowers. Everything is ready, you have made a delicate topiary with your own hands from satin ribbons, worthy of a gift and the best decor for a girl’s room.
Ribbon topiary: do it step by step (video)
Remember that topiary is considered a tree of happiness, which means that by growing a tree in this handicraft way, you are creating. And any creative work is connected with thoughts, desires, and spiritual forces. Make a wish, and your tree may help make it materialize.
DIY tree of happiness. Master class with step-by-step photos
Markina Natalya Ivanovna teacher of additional education, MBU DO Center for Extracurricular Activities, Volgodonsk district, Rostov region.
Description: The master class is addressed to children of high school age, additional education teachers, parents, and all those who love to do handicrafts.
Purpose: gift, interior decoration.
Target: making a tree of happiness.
Tasks:
- develop creative imagination;
- cultivate perseverance;
- develop aesthetic taste;
- cultivate accuracy when performing work.
A topiary or tree of happiness will serve as a wonderful decoration for your interior and at the same time will be one of the best options for a hand-made gift. Even beginning craftswomen and amateurs can create this decorative tree. Learning this skill is not difficult, and the materials and tools are inexpensive. The most important thing is your time and sincere desire.
Materials and tools required for work:

- pink satin ribbon 2.5 cm wide;
- pink threads;
- needle;
- scissors;
- candle or lighter;
- decorative ball;
-dry tree branch;
-pots;
-sea pebbles;
- universal glue;
- large beads.
1. Take a ribbon with a width depending on how large the rose is needed. I have a 2.5 cm ribbon, which makes a relatively small rose. We cut the ribbon into 25cm pieces and trim the edges with a candle or lighter. Fold one end at a 45 degree angle.

We twist the tape 5 mm 2-3 times. The result is a rosebud. Along the bottom edge of the ribbon with a twisted tube, make several securing stitches with a needle to secure the central part of the rose.

We hold the bud vertically in our left hand, and with our right hand we bend the long end outward at an angle of 30 degrees.

Wrap the ribbon around the bud.

Bend the long end out again and wrap it around. We do this until the end of the ribbon until we get the required size of the rose. We form a beautiful rose. We secure it with a needle and thread, making several stitches.

Our satin ribbon rose is ready. In this way we make another 26 roses.

2. We make the base of our tree, connect a decorative ball and a tree branch (previously painted green), fix it with universal glue.

3. Place in a pot and cover with sea pebbles.

4. Let’s start decorating our tree, glue on roses and beads between them.

5. The tree of happiness is ready! If desired, you can decorate with moss and a ladybug.

A popular art form, topiary, was known back in Ancient Rome. It is still quite common in many European countries, including our country. It is believed that the “tree of happiness,” as it is affectionately called in Europe, brings prosperity, success and prosperity to the home. This article will help you make a chic topiary with your own hands from satin ribbons and organza. Detailed master class and photos are attached.
A variety of materials are suitable for making this beautiful and unusual tree - decorative paper, organza, satin ribbons, artificial or fresh flowers, coffee beans. Some craftsmen even make topiaries from candies and various sweets. And what your “tree of happiness” will be made of, choose for yourself.
- Topiary from satin ribbons They look especially stylish and beautiful. In most cases, ribbons are selected in one or two colors that contrast well with each other, for example, white and blue, red and pink, yellow and green. Topiaries made from pastel-colored ribbons look impressive. Ribbons can be twisted into the shape of flowers, balls, droplets, bows, pasted over the crown of a tree or wrapped around a trunk.

Ribbon topiaries are one of the most popular hand-made gifts. More than one master class is devoted to how to create a beautiful tree with such an elegant, cute crown with your own hands. Flowers are usually made from ribbons, often roses, which become the main detail of the topiary.
In order for the crown to be a scattering of delicate roses, you need to make at least ten such flowers.

Making roses from ribbons step by step:
- Take the ribbon so that the reverse side is facing you;
- Start twisting the left edge in the direction from left to right, getting a column;
- Twist almost to the end, so that a small triangle with a side of 2 cm remains;
- Now you need to twist the rose itself, hold the base of the flower with your left hand, and turn the ribbon away from you with your right hand, while bending it;
- With your left hand, with your thumb and forefinger, hold the rose by the base, twist it counterclockwise, and with your right hand bend the upper edge of the ribbons away from you;
- When the rose is formed, bend the end of the ribbon and connect it to the base;

In this case, the main thing is skill; the first couple of roses with your own hands may not turn out right away, but then the work will resemble a conveyor belt.
How to make roses for topiary (MK video)
DIY topiary made from ribbons: flowers, master class No. 2
You can also make flowers with petals facing out, like a chamomile. If you are making topiary from ribbons for some joyful event, perhaps for the birthday of a child or teenage girl, this master class will be just in time.

Instructions with step-by-step tips:
- Take satin ribbons of different colors, you can even have a pattern;
- Cut the tape into equal lengths;
- You can make the base of a flower from two felt circles;
- Bend one piece of ribbon in half, and insert the two open ends into the middle between the felt circles;
- Do this with each petal, and you can fix it in the felt core using a heat gun or simply stitch it;
- The petals can be multi-colored or plain, it all depends on what kind of topiary you ultimately want to get.

An alternative MK will show how else you can make flowers for topiary.
Flowers from ribbons for topiary (photo master class step by step)


Such a flower can become a bright highlight in your topiary; the remaining elements can be made simpler.
Ribbon topiary: how to make a sunflower
This MK also involves many variations. Most often it is a combination of materials, such as ribbons and coffee beans. This DIY option is probably the most popular.
It's not that difficult to make. You will need a yellow satin ribbon that is wide enough. From it you must cut out at least 20 identical petals. To prevent the fabric from falling off, it will have to be melted over a flame, but only together with the fastenings.

The fact is that you are not just cutting out oval petals, everything is a little more tricky.
To make a sunflower petal you need:
- Take a piece 15 cm long and bend it in half;
- Bend it so that when you connect the ends you get a loop;
- When melted, the ends will not only not crumble, they will also be held together.

You make the core with your own hands from coffee beans. You can glue them onto some kind of durable base like felt or regular cardboard.
DIY sunflower made from ribbons (MK video)
Ribbon topiary: master class from start to finish
So, it's time to use flower blanks and finally make this souvenir flowering tree.
Having collected all the materials together, you can start by making the base for the crown. Let's say you decide not to make this base ball with your own hands, but use a foam blank. Great, save time. But if you don’t find such a blank, take the most ordinary newspapers, threads and glue. Make a ball of newspaper, weigh it down with glue, and wrap it with thread until it looks like a ball. The base is ready!

- The newspaper ball needs to be painted to match the color of your roses, daisies, etc.;
- In one of the places of the ball, make a hole for the barrel;
- You can insert the trunk into the ball immediately, fix the branch or stick with hot glue;
- Hold the barrel in the ball for a while, do not let go until it “grabs” well;
- Now this entire structure can be decorated - wrap the trunk with satin ribbon or decorative braid, without deviating from the general color scheme;
- Fix the ends of the tape or braid with glue;
- The time has come to attach the flowers, hot glue and a hot glue gun will help you do this carefully, attach so that the gaps are as invisible as possible;
- The result is a trunk with a crown that needs to be planted somewhere;
- You can buy a beautiful flowerpot at a flower shop, and you won’t have to do anything yourself;
- You can decorate any container - wrap a cup or glass with lace ribbons or crepe paper, paint it with acrylic paints, wrap it with knitting threads to match the crown, etc.;
- Now pour the gypsum solution into the pot and lower the tree there, hold until it stands firmly and evenly in the plaster;
- All that remains is the finishing decor - decorate the top layer of plaster with transparent artificial stones, which shimmer so beautifully in the sun.

You can plant a figurine of a ladybug or a butterfly on one of the flowers. Everything is ready, you have made a delicate topiary with your own hands from satin ribbons, worthy of a gift and the best decor for a girl’s room.
Ribbon topiary: do it step by step (video)
Remember that topiary is considered a tree of happiness, which means that by growing a tree in this handicraft way, you are creating. And any creative work is connected with thoughts, desires, and spiritual forces. Make a wish, and your tree may help make it materialize.
Ribbon topiary (photo)