
Pattern for decorating a basket made of tubes. A basket of newspaper tubes for beginners step by step with photos
Wicker basket made of newspaper tubes with lid
- Weaving baskets from newspaper tubes for beginners: what is important to know
- Weaving a handle for a basket from newspaper tubes
- Options for decorating finished products from newspaper tubes
If you like creativity and handicrafts, we recommend that you learn how to weave baskets from newspaper tubes. First, it helps create great places to hang out. storage of things, and secondly, having comprehended the basic principles of this needlework, you will be able to save on buying baskets from natural materials – rattan, straws and vines.

Vases, bowls, storage boxes - these and others decorative crafts can be created using newspaper and magazine tubes

Basket in “paper patchwork” style
Weaving baskets from newspaper tubes for beginners: what is important to know
- This handicraft is absolutely not expensive. To make a basket you will need things that are in every home: old newspapers, a cardboard box for the base, a knitting needle or wooden skewer, glue and dye. As you can see, the set is entirely budget-friendly.
- The finished product looks no worse than store-bought baskets made from expensive materials (for example, rattan, which is now fashionable).
- The basket can be of any shape and size. Once you have mastered the simple geometric shapes(for example, weaving round baskets from newspaper tubes), you can try your hand at making more complex products - openwork, polygonal, and so on.
- The technique can be used for different purposes (this can be weaving laundry baskets from newspaper tubes, making boxes for storing sewing or knitting supplies, jewelry boxes).
- The finished product fits harmoniously into many interior designs. styles (country, Provence, bungalow, eco and so on).

Wicker baskets made from newspaper tubes are a stylish and budget-friendly decor option for your home

Unconventional solution for trash can
Weaving baskets from newspaper tubes step by step
So, we will need the following:
- old newspapers;
- ruler;
- scissors;
- pencil for marking;
- a long knitting needle or wooden skewer (approximate thickness is about 1.5-2 mm);
- cardboard base box;
- paper glue;
- elastic band for securing tubes;
- tweezers;
- glue “Second” or “Moment”.
We will look at weaving a square or rectangular basket from newspaper tubes, as this is the simplest option, ideal for beginners.

Weaving baskets from newspaper tubes step by step

Round basket made of bright newspaper tubes with a removable cover

Laundry basket made from newspaper tubes

Linen basket with colorful inserts

Lids for oval and round wicker baskets
Advice! Stand tubes can be used to process the top edge of the basket. To do this, take a post and thread it under the cross weave, passing the other two posts. The most convenient way to do this is with tweezers.
As for weaving the bottom of a basket from newspaper tubes, beginners can be advised to simply cover the bottom with a beautiful fabric on the inside, and glue cardboard of a suitable color to the outside.

If desired, the baskets can be coated with bright paint

Or shiny gold

Convenient basket with handles

Weaving pattern for the bottom of the basket

Colorful magazine baskets
Weaving a handle for a basket from newspaper tubes
If you want to add a handle to your finished piece, there are many weaving techniques you can use. We offer you a relatively simple option that even novice craftswomen and craftsmen can handle.
So, we will need:
- 4 long tubes (it is advisable to slightly moisten them with a spray bottle for additional flexibility);
- clothespins.
Let's get started:

Handicraft basket with a beautiful handle
Advice! If you want to make the handle more colorful, you can paint each tube separately. color. Intertwined, they will look original.
Options for decorating finished products from newspaper tubes
So, the basket is ready, but the chaotic pattern of printed letters can hardly be considered a worthy decor. Now comes the final stage of production - decorating the finished product. How to finish weaving a basket from newspaper tubes?
- The easiest way to decorate a wicker basket is to cover it with paint. It is best to use acrylic paint, as it is not afraid of moisture, which means that the basket can then be wiped with a damp cloth to remove dust. If you don’t have acrylic paint, you can use simple gouache, but in this case you will have to coat it with varnish. Depending on what result you are striving for (you want the basket to have a rich or translucent color), the product must be treated with paint in one or two layers. A larger number of layers is undesirable, since there is a high probability that the finished product will turn out to be rough.
- If you don't want to get a plain basket, you can decorate it with a pattern. For example, use rice paper or napkins to decoupage. Select a suitable design, carefully cut it out with nail scissors, attach it to the basket and cover it with PVA glue diluted with water. Make sure that the napkin or rice paper didn't break. When the drawing is dry (you can use a hairdryer to speed up the process), cover it with a layer of varnish.
- The product can be decorated satin ribbons. To do this, even at the weaving stage, leave free the space where you plan to place the ribbon. To do this, measure its width and do not braid the basket at this level. When the product is ready, pass the tape between the stand tubes and secure its ends with glue or a few stitches of thread.

Desktop basket for storing small items

Beautiful floor vase

Craft tray

Floor vases made from newspaper tubes for every taste
Advice! You can also decorate the corners of the basket. To do this, you can attach large beads or medallions to them with glue.
- Another option original decor is the use of curly pasta. Leave room for future decor, as described above. Coat the pasta “shells” or “petals” with metallic spray paint and glue them onto the finished product.
- Weaving a lid for a basket from newspaper tubes can be completed with decor in the form flowers from skin. To do this you need to cut out genuine leather blanks in the form of droplets (future petals) and ovals with a sharp corner (leaves). Hold the blanks with tweezers over the candle flame for a few seconds so that they bend slightly and become voluminous. Then glue the petals and leaves onto the lid of the box.

Basket with a decorative bow

Don't limit your imagination

Fruit basket with lace top
Let's sum it up
Weaving products from newspapers - exciting activity. Experiment, use different patterns for weaving baskets from newspaper tubes, and you will get original and beautiful products that will decorate your interior.

Rectangular two-color basket

If you don't have paints, you can use a marker
Weaving baskets from newspaper tubes - video
Weaving baskets from newspaper tubes - photo
Photo gallery (26 photos):

Some experts condescendingly claim that handicrafts are something bordering on art. Looking at the masterpieces of our craftswomen, we can say with confidence that such things have a place in an art gallery and this is precisely true creativity. Here there is a flight of fancy, exquisite taste and the most complex technique of execution. Today we will look at weaving from newspaper tubes step by step. New ideas for beginning needlewomen, basic techniques and useful tips- in this material.

In the finished work it will be difficult to paint all the weaves with high quality.
You should not use watercolors for painting. It gives a dull color. Gouache or acrylic paint is more suitable. It is worth considering that acrylic cracks after drying, so if you decide to paint with acrylic, treat the finished product. To add color to the work, some craftsmen use spray paint, water-based composition and food coloring.
For shine, finished works are coated with several layers of varnish. In addition to its decorative purpose, varnish also serves as a hardener.

Weaving methods
It is enough for a novice craftsman to master several basic weaving methods. All other options are based on them and will not be difficult to deal with.
- Spiral weaving. A simple option that even a child can master. The tubes are successively built up and threaded through the base in a continuous manner.
- Layer weaving. Two tubes sequentially go around the posts so that one passes in front of it, and the other behind it. This principle is used on cotton fabrics.
- Rope technique. The strips are intertwined with the posts on the product and with each other.
Mastering these basic techniques will lay the foundation for further experiments.
For more information about weaving techniques from newspaper tubes, see the video at the end of the article.
Related article:
In the article we will consider in detail the technology of making flowers from paper with a photograph of each step, as well as others original crafts that even a beginner can do.
Weaving from newspaper tubes for beginners step by step: different products
After mastering the basic techniques, you can begin your first job. It's better if it's a basket. This simple option will help you master the technology, and the finished product will certainly be useful in the household.
How to make a basket from newspaper tubes step by step
To make a basket you will need:
- newspaper tubes;
- base - pot or jar;
- for the bottom;
- acrylic paint;
Sequence of weaving a basket from newspaper tubes photo:


- Two circles are cut out of cardboard. Newspaper tubes for the stands are glued to one of them at equal distances. The structure is closed from above with a second circle. The tubes - racks are bent upward. A form is inserted inside the frame. The top of the posts can be fixed wide elastic band. The frame is ready.
- We weave the walls. To do this, we take a tube, fix its edge at the base of one of the racks and begin to weave it around the racks. When the length of the tube does not allow you to continue weaving, you need to increase the newspaper vine. To do this, the ends need to be inserted into each other, after dropping glue onto the joint.
Important! When you twist the tubes, one end is narrower than the other. Accordingly, when connecting, the narrow tip is inserted into a wide hole.
- To decorate the edges of the basket, the posts are sequentially intertwined with the main vine and secured on the inside with glue.
- The last stage of work is decorating the product. To do this, the basket is completely covered acrylic paint and two layers of acrylic varnish. Afterwards, you can decorate the basket with ribbons, beads, braid and other accessories.
Advice! The base of the basket can be made not from cardboard, but from tubes. To do this, a flat base is woven, the axes of which become racks.
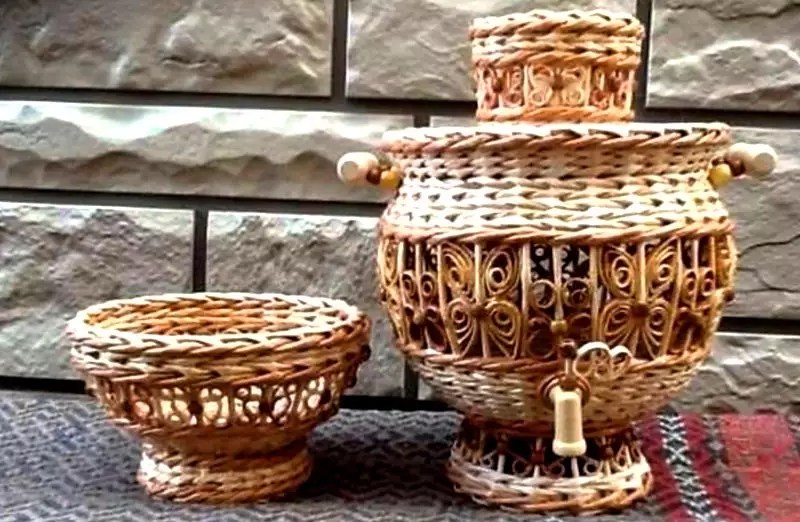
In the same sequence, you can make a vase from newspaper tubes:
Secrets of weaving a rooster from newspaper tubes
The rooster is not only a symbol of the year, but also a talisman for the home. In Russian culture, the symbol of the rooster signifies wealth and prosperity in the family.
To weave a talisman you will only need newspaper tubes painted in bright colors.
- It is necessary to create a basis. For strength, you can thread a wire inside the newspaper tube.
- The cockerel's body, head, beak and beard are successively entwined with colored tubes.
- The tail and paws are done last. If the weave is tight enough, the cockerel can be placed on its feet. For additional strength, it is better to coat the product with varnish.
Photo of a cockerel step by step (crafts from newspaper tubes for beginners).
The article will tell you how to create beautiful crafts from improvised material - newspaper tubes.
Weaving from newspaper tubes for beginners step by step: weaving technique, master class, photo
Weaving from newspaper tubes has almost completely replaced weaving from wicker in recent years. The fact is that it is much easier to get this material than breaking willow branches or looking for a vine for weaving. In addition, you don’t have to spend money, because even if you don’t have a stack of TV programs or advertising publications lying around your house, you can always ask your loved ones for them.
IMPORTANT: A thin long tube spins from a sheet of newspaper, which is the main material. The tube is held together with regular PVA or dry pencil glue. Moreover, it is not necessary to lubricate the entire sheet. This can only be done on the corner of the newspaper.
In the case when you need to lengthen your newspaper tube, you simply insert the blanks one into another and place them on the glue, continuing the weaving. You can glue tubes in this way almost endlessly, creating both small boxes and large vases the size of a person.
There are several weaving techniques, which depend on what kind of product you are creating and what kind of pattern you want to make. When weaving, it is important to use patterns and patterns so that the design is beautiful and neat. In cases where the “sucker” cannot be inserted with your finger, you should use with a regular metal knitting needle or crochet hook.
When finishing the weaving (for example, at the edge of the product), you should tuck the rods so that they bend inward. There you can place them on glue or wrap them so that the end is not visible. The finished product is usually coated with paint. To do this, it is advisable to use acrylic or spray paint; it is resistant to moisture. After drying, it is advisable to open the product with one or two layers of varnish.
Weaving techniques, patterns:
Types and techniques of weaving  Patterns and techniques of weaving from newspaper tubes
Video: “Seven types of weaving”
How to make tubes from newspapers for weaving?
Any weaving begins with preparing the material, which means you should prepare a lot of newspaper tubes in advance. To twist a beautiful and even tube, you should use a long wooden skewer (for kebab) or a thin metal knitting needle.
It is this item that you will lay the base of a sheet of newspaper and twist the tube. Due to several layers of paper, it will be quite dense and suitable for creating wickerwork. Carefully coat the corner of the newspaper with glue so that it can stick securely and the tube is strong.
Video: “Twisting tubes from newspapers: nuances and secrets”
Where to start weaving a basket from newspapers?
After you have prepared a sufficient number of tubes, you should start choosing the shape of the product: square, round, rectangular, heart, and so on.
You should decide what kind of bottom the product will have. There are two options:
- Cardboard bottom
- Bottom knitted from tubes
The cardboard bottom is suitable for small products (boxes and boxes). Large ones (trays, boxes, drawers) should be woven yourself. Any weaving should be done in strict accordance with the pattern. To make the weaving neat, you should secure the ends of the tubes with clothespins, pinching them to the form.

 Box with cardboard bottom
 Weaving the bottom for products from newspaper tubes
  Step by step weaving products from newspaper tubes
 Description of weaving the bottom:
- Cross 8 tubes together (photo 1)
- Start weaving in a circle, bending each tube clockwise (photos 2 and 3).
- Weaving should continue until you reach the required bottom diameter.
- Extend the tubes by inserting a new one each time (photo 4)
- Prepare the form for tying
- Lift the tubes and secure them with clothespins to the edge of the mold (photos 5 and 6).
- Extend the tubes and continue weaving in a circle
Video: “Candy bowl made from newspaper tubes: master class”
What and how to paint newspaper tubes for weaving a basket?
It is better to paint newspaper tubes after the product is completely completed. If you dye them in advance, you risk ruining their good flexibility, making them unyielding, which will completely ruin the weave.
The finished product should be coated with acrylic or machine paints. Such paints are moisture resistant and do not flow when in contact with water. The paint can be applied in any way: with a brush, sponge, spray gun, spray gun, airbrush. Acrylic paints mix well and you can always choose the desired shade and color from them.
IMPORTANT: After the paint has dried, the product should be covered with a layer (or two layers) of varnish. This will allow the product to gain a glossy shine and become much stronger.
Photos of finished products:

 Bright baskets for storing things
 Products painted in natural color vines
 Product painted with paint and decorated with ribbon
  Multi-colored storage box
  Bright bread box made from newspaper tubes
 Simple folding of the edge when weaving from newspapers: diagram, photo
Simple folding is a simple way to weave products from newspaper tubes. Any beginner in this business will master this weaving. Weaving is based on bending twigs intertwined with each other in one direction (see diagram).

 Simple bend: diagram
 Step-by-step weaving: simple bend
 Video: “The simplest bends”
Weaving from newspaper tubes - bending a rod: diagram, photo
The bends of the “rod” should be woven on vertical columns of newspaper tubes. The bend is made according to the principle of weaving baskets from wicker.

 Bending weaving technology
 Weaving from newspapers: volumetric bending
Weaving “volumetric bending” is necessary for a beautiful completion of the weaving of the product in order to give it a curly and voluminous edge in the form of a braid. This weaving is suitable for knitting vases, flower pots, drawers and boxes. Every needlewoman can make such weaving using step by step work in photos and diagrams.

 Weaving a volumetric bend: step by step
 Volume bend: diagram
 Weaving from newspapers: folding lazy braid
The lazy braid is an easy way to complete any knitted product. All weaving is based on the principle of weaving twigs into one braid and running it along the entire edge of the product.

 Lazy braid curl
 Weaving from newspapers: “isis” bend
This bending is distinguished by its simplicity and ease of weaving. The edge is not voluminous and narrow. Weaving is suitable for completing knitting boxes.

 Isis bend: diagram
 Weaving a product with an “isida” bend
 Weaving from newspapers: double bending
Double folding is suitable for weaving baskets to create a beautiful and voluminous edge. This bending is also similar to the principle of braiding.
 Double bending: diagram
 Weaving from newspapers: complex bending
A complex fold will definitely decorate baskets and boxes, boxes and vases woven from newspaper tubes. Weaving it is much more difficult, since it requires exact adherence to the pattern.
 Complex bending: diagram
 Complex bending: weaving
  Complex bending: step-by-step work
 Weaving from newspapers: folding the edge, finishing the product
Beautiful completion of the weaving (that is, “bending”) will make the product very neat and aesthetically beautiful. You can use any patterns to weave a beautiful edge.
 The simplest bending: diagram
  Bend the tubes to complete the weaving
 Video: “Bending the rod”
How to weave the bottom of a basket, box, box?
Miniature products (boxes and caskets) should be weaved by forming the product according to a given shape. To do this, use any sign of your preferred size. As with any product, prepare a sufficient number of tubes and decide what kind of bottom it will be: wicker or cardboard. After this, fix the tubes and begin weaving, focusing on the diagram and pattern.

 Step-by-step creation of a lid and bottom for a box
  Casket from cardboard box tied with newspaper tubes
 Weaving an oval box step by step in photos
 Finished heart-shaped box: bottom made of cardboard
 How to weave basket handles?
Creating a basket from newspaper tubes begins with weaving the main part and only then you separately make a handle that is woven into the product. You should symmetrically mark two opposite edges of the basket and insert several twigs of newspaper tubes into them (about 8 pieces). The twigs are bent and the handle is woven like a braid (or look at weaving patterns). There should be absolutely identical parts of the handles on both sides, which are connected together and tied. Braiding a braid on a handle made of twigs  Easter crafts from newspaper tubes
 Interior items made from newspaper tubes
Video: “Crafts from newspaper tubes for beginners”
Deposits of old, read and no longer needed newspapers can be useful not only for cleaning or lighting a fire. If you wish, you can combine two useful activities at once: get rid of stacks of waste paper that collects dust, and acquire new decorative elements or even furniture.
To understand how one is connected to the other, just look at the photo of weaving from newspaper tubes on the Internet.


The principle of weaving using newspapers
To turn old newspapers into a coaster, basket, or even a box, you need to turn newspaper sheets into narrow tubes that look like the vine from which wickerwork is made.

Due to its softness and plasticity, even a beginner can master the technique of weaving with newspaper tubes. And taking into account the strength of the material, especially if it is treated with special compounds, the result of the work will last a long time and of high quality.

Before you start weaving, you will need to prepare the materials necessary for the work and make blanks.


The list of all components will include:
- a stack of newspapers (the volume of material depends on the size of the planned product);
- paper glue;
- scissors;
- ruler;
- knitting needle, about 2 mm thick;
- sheet of cardboard;
- acrylic paint of the selected shade.

The production of blanks refers to the transformation of newspaper sheets into tubes. Step by step instructions Such production includes several stages.

First, you need to cut the existing sheets lengthwise into strips 10 cm wide (using a ruler and scissors).


Secondly, the resulting strips are wound on a knitting needle one by one, and the process begins from one corner of the paper to the other diagonally. The extreme corner of the sheet is smeared with glue and secured to the resulting tube.

DIY tube weaving
Ideas for weaving from newspaper tubes can affect any area of life. In this manner, you can make an office organizer, a jewelry box, a candy vase, or a linen drawer.

The only thing you should avoid when using this material is weaving massive furniture. A light shelf with a durable frame can still withstand light weight, but weaving, for example, a chair from newspaper tubes is an impractical process.

If we talk about the first product with our own hands, then it is better to focus on simple decorative items, which, in case of an error, can be easily corrected. Moreover, find and view detailed master class it is much easier to weave a vase or basket.

Basket made of newspaper tubes
Weaving a basket from newspaper tubes for beginners is one of the simplest, but interesting activities. The main thing here is to adhere to the system and monitor the correct sequence of actions.

The start of work fully corresponds to the described process of procurement of materials. the further algorithm of actions looks like:
On a sheet of cardboard, using a compass or a suitable sized utensil (jar, bowl, etc.), mark the diameter of the base of the basket.

Two identical base circles are cut out of cardboard. On one of the cut out circles, along the edge of the circle, marks are made with a pencil in increments of 1-2 cm.

The prepared tubes need to be flattened on one edge to a distance of 3-3.5 cm. Each tube with its flattened side is secured with glue to a cardboard circle with marks (one tube per mark).


A second cardboard circle, greased with glue, is placed on top of the glued “sun” of tubes and pressed tightly. When the glue has firmly set, each newspaper “vine” needs to be bent upward at a right angle - you will get a frame for the basket.

To prevent the tubes from falling apart, the frame can be secured with an elastic band. The tube of the first layer is glued with its flattened end to the cardboard base inside the frame and is wound behind the nearest twig on the right so as to go around it from the outside.

The next twig of the frame must be circled with a strip from the inside. Alternating in this way, the strip is continued until the strip is completed. When one strip ends, the next tube is screwed into its end so that there are no breaks in the material.

To ensure that the product has smooth sides, after completing the first row, it is better to place a jar or glass of the appropriate size inside the frame.

When the product reaches the planned height, the edge of the tube is cut with a small margin, and the remaining tip is bent inward and glued. The protruding rods of the frame are also cut to the level of the edge.


The first and second tubes of the frame, to the right of the tip of the last strip, need to be cut with a margin, bent inward and secured with glue.

The product is ready, all that remains is to cover it with acrylic paint. Moreover, it is important to pay more attention to the base, covering it with three layers, and the sides of the basket can be painted with one or two layers.

Photo of weaving from newspaper tubes


Previously, in villages weaving baskets, boxes, various products was a common occupation. We did this mainly on long winter evenings. The material for weaving was vine. You might think that this hobby has sunk into oblivion and only a few are involved in it, but this is not so. Nowadays you can find craftswomen making beautiful decorative wickerwork from newspapers. By mastering weaving from newspaper tubes step by step for beginners, carefully following the instructions, you can learn this handicraft.
The material used by needlewomen is not vine, due to its inaccessibility, and tubes from newspaper. Products made from such raw materials are almost identical in appearance to the usual products made from wicker or straw. After processing, they are durable, practical and beautiful.
 This is not only a fascinating, but also a useful activity in everyday life, since the products can be both decorative and used in the household. This type of creativity does not require any financial investment or special training, and the result often justifies the time spent.
Tubes for weaving are made from newspapers, magazines, receipt paper, etc. The material is very inexpensive, and may even be free. For example, free newspapers are dropped into mailboxes, distributed near the metro or inside the metro.
Preparation of material
The newspaper is divided into several pages in the direction of the text, 7-8 cm thick, cut and using a thin knitting needle, starting from the corner, twisted into a tube. The needle is taken from 2.5 to 3.5 mm. These are standard recommendations; of course, you can try other options. The thickness and length of the tube depend on the angle of twist. The flatter the angle of application of the knitting needle to the corner of the paper, the thinner and longer the tube is obtained.
 At the end of the twist, it is secured with a drop of PVA glue or pencil glue. The disadvantage of fixing with PVA glue is that when painting the tubes, the gluing area is not painted over. Since this segment is located on the edge, some people cut it off during work.
Important nuance: if you twist tubes from a newspaper, then from the outer strips, where the white outline of the newspaper runs without text, you get clean white tubes without font. You should also take into account that newspaper fingers quickly get dirty from printing ink. You should periodically wipe them with a napkin so that there are no stains on the white tubes.
Processing of tubes
Weave from paper vine you can directly after twisting or carry out additional processing, that is:

Types of weaving
When making products, the paper vine is extended by inserting one tube into another. The fact is that during the twisting process, one end turns out to be thicker than the opposite, and it is not difficult to connect them. You can use a drop of glue, but many people do without it. If the tip is too soft, you can trim it slightly to make the connection easier.
There are several types of weaving baskets from newspaper tubes, and they are similar to natural wicker weaving:

It is recommended to start weaving with wicker with the simplest and most versatile “rope” weaving. It is more durable than simple weaving and looks more beautiful. In addition to using different techniques for this type of needlework, you can create patterns by skipping rows or creating holes in the work. Using different colors tubes and alternating them, you can create your own unique patterns and combinations.
Type of weaving from newspaper wicker "rope"
Before you make a paper basket with your own hands, you first need to decide on the shape of the product. She can be anything: round, square, oval or others geometric shapes. It’s better to choose a layout along the contours of which you will work. You will put it at the bottom of the basket and braid it. This promotes even and comfortable weaving, helping to avoid distortions and deviations from the chosen shape. Layouts are usually used as shoe boxes, dishes, existing boxes, etc. Unusual shapes, for example, a heart, can be made yourself from cardboard.
 Making a basket begins from the bottom; it can also be woven from wicker, or it can be made from thick cardboard. Cut out two pieces of cardboard according to the shape of the bottom, cover it with the remains of wallpaper, decorative paper, or thin fabric, depending on the idea. Tubes are glued to one part along the perimeter at equal distances, covered on top with another part with glue, everything is carefully pressed and left under pressure overnight.
Folding the edge of the product
 When you have completed the work at the required height, a the need to process the edge of the product how to finish a craft. To do this, the tubes are bent in a special way. There are several types of edge bending: simple, voluminous, complex, pigtail, etc. Finishing folding patterns are as varied as the types of main weaving. You can use only racks for bending or create a more decorative look by introducing additional tubes.
To make processing easier, the edges of the stand should be shortened with scissors. After bending, they are glued. After the glue has dried, cut off the remaining ends. If necessary, you can add handles to the basket or make a lid.
Final processing
 This is where you can show all your imagination.. First, you should coat the product with a primer along with PVA glue or just glue diluted with water. This is done to obtain greater strength and rigidity of the basket. When the composition dries a little, the craft can be slightly straightened in shape and left to dry further. Next, you can make the basket colored, decoupage it, decorate it with ribbons, stick on raised decorative elements, etc. The final stage Your creation will be coated with acrylic varnish with a glossy or matte effect. This varnish is very convenient, odorless, easy to apply, and dries quickly.