
Cum se face o ramură de brad din hârtie ondulată. Ramura de brad de Craciun cu conuri de hartie ondulata
A face jucării de Anul Nou cu propriile mâini este util nu numai pentru că obții un lucru exclusiv pe care nimeni altcineva nu îl are, ci și pentru că în timp ce faci jucăriile de Anul Nou tu simți senzația de vacanță, starea ta de spirit se îmbunătățește, creierul și psihicul se odihnesc - aceasta este și o bună terapie împotriva oboselii și stresului care atât de des ne bântuie la serviciu, mai ales la sfârșitul anului.
Vă invităm să creați un meșteșug frumos și neobișnuit de Anul Nou din hârtie ondulată - o creangă de brad. O astfel de ramură de molid nu se va prăbuși sau nu se va îngălbeni și arată exact ca una adevărată. Deci să începem.
Meșteșug de Crăciun din hârtie ondulată „Fir Branch”
Pentru a realiza aceasta ramura de brad din hartie ondulata veti avea nevoie de hartie de 3 culori: verde pentru ramura in sine, maro pentru conuri si albastru, cyan, galben sau orice alta pentru fundita decorativa. În plus, veți avea nevoie de foarfece, lipici și sârmă metalică.
Tăiați hârtia verde în fâșii lungi de aproximativ 4-6 cm lățime. Pentru viteză, puteți îndoi hârtia în mai multe straturi. Acum tăiați fâșiile de hârtie în cruce, la aproximativ 1 cm mai puțin de capăt, în fâșii de aproximativ 0,5 cm lățime - acestea vor fi ace de pin.
Acum răsuciți fiecare bandă într-un flagel subțire, apoi luați un fir de metal și înfășurați strâns benzile de hârtie cu flageli răsucite în jurul firului. Ca rezultat, ar trebui să aveți ramuri de pom de Crăciun cu ace moi.

Acum începeți să faceți conuri. Luați 2 bucăți de sârmă de 20-25 cm lungime, așezați-le pe hârtie maro paralele (la distanță de 6-8 mm) și înfășurați-le în hârtie. Acum răsuciți firul într-o buclă lungă. Și apoi luați această hârtie și începeți să o înfășurați în jurul degetului (cu partea liberă a hârtiei în jos), simulând o umflătură. Din partea liberă a hârtiei, formați tulpina unui con și fixați cu sârmă sau ață. Înfășurați piciorul în hârtie creponată verde.


Acum conectați ramurile rezultate cu ace și conuri, decorați toate acestea cu o fundă din hârtie ondulată strălucitoare și un șnur decorativ.

Dintr-o astfel de ramură de molid din hârtie ondulată puteți face un panou, o compoziție de masă sau chiar o coroană de Crăciun - doar închideți ramura într-un inel, fixați-o și legați locul unde este fixată cu o fundă.
Dacă decorezi casa cu copiii tăi, pune-i să facă copaci drăguți pentru a decora.
Un con de hârtie este un meșteșug simplu tridimensional și, împreună cu o crenguță, face o compoziție interesantă care va decora o expoziție, interior și va fi un cadou excelent pentru cei dragi, pe care un copil îl va face cu propriile mâini. În ciuda ușurinței, în unele cazuri poate fi necesară asistența unui adult.
Materiale pentru con:
- Hârtie maro;
- Adeziv PVA, foarfece, un creion simplu.

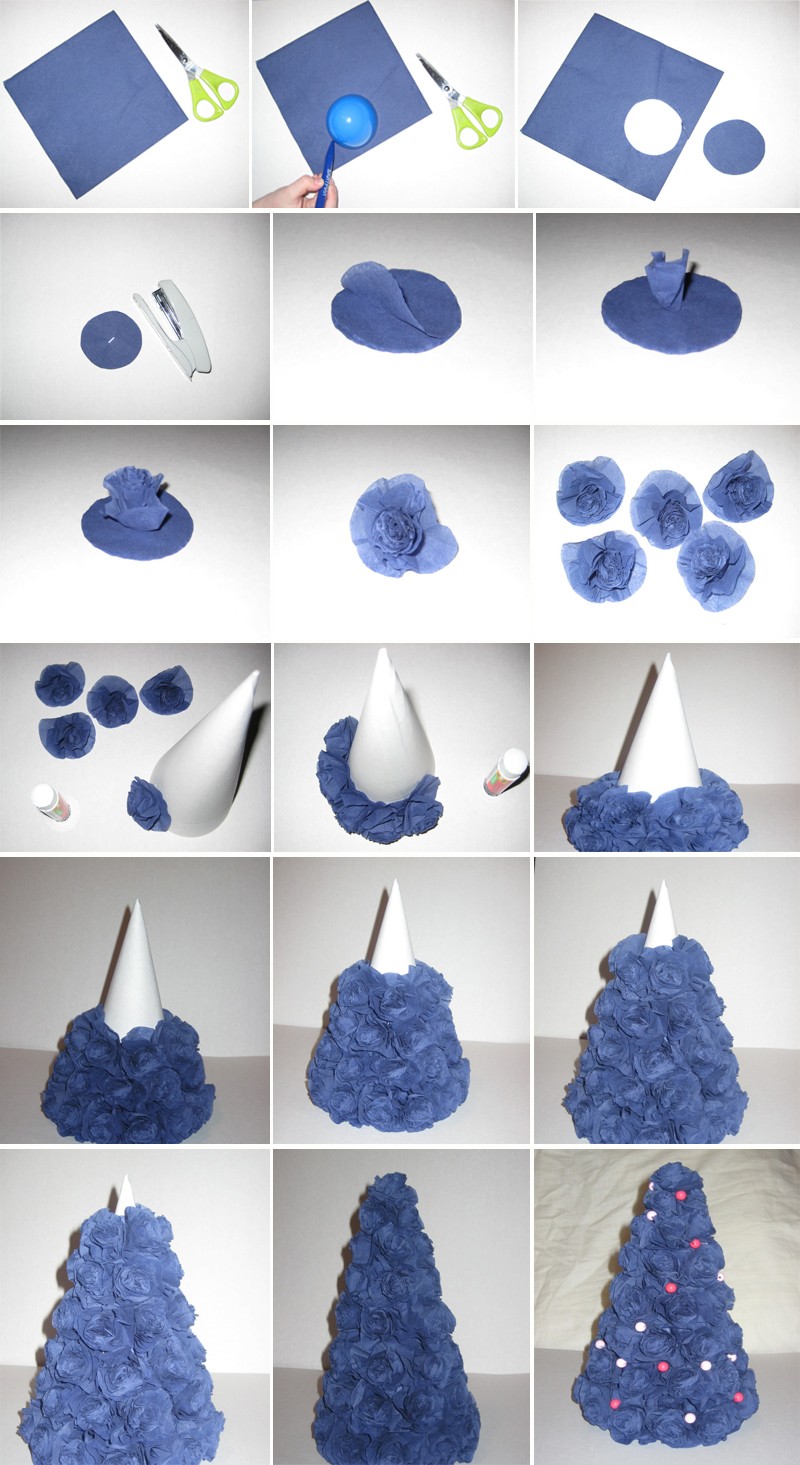
Cum se face un con de hârtie?
Ați observat că conul arată ca o floare deasupra și în secțiune transversală? Deci conul nostru va fi format din multe flori de diferite dimensiuni. Folosește un șablon sau desenează 4 flori, de la mare la mică. Pentru ambarcațiune vom avea nevoie de:
- 8 flori mari - O dimensiune (uita-te la fotografie);
- 6 culori – marimea B;
- 4 flori – marimea C;
- 5 flori – mărimea D.

Pregătirea componentelor
Redesenați conform șablonului și tăiați toate aceste flori. O foaie de hârtie poate fi suficientă pentru un con, dar asta numai dacă economisiți spațiu cu grijă, desenați fiecare floare și decupați fiecare. Dar puteți scurta semnificativ întregul proces - îndoiți hârtia de mai multe ori și tăiați mai multe flori deodată. Dar în acest caz va fi mai multă hârtie.

Tăiați un dreptunghi din hârtie, puțin mai mic decât partea îngustă a hârtiei, este mai bine să tăiați excesul mai târziu, altfel lungimea nu va fi suficientă.

Îndoiți piesa într-un tub foarte subțire. Lucrul aici este destul de delicat, deoarece tubul trebuie să fie dens; straturile conului de pin vor adera la el. Dacă există probleme cu acest lucru, este mai bine să folosiți un bețișor de kebab în acest scop.

Acum trebuie să faceți o mică gaură în centrul fiecărei flori (copiii vor avea nevoie de ajutorul unui adult) și să îndoiți petalele tuturor florilor în jumătate pentru a da volum florilor.

Asamblarea conului
Toate componentele conului de hârtie sunt gata, este timpul să le puneți împreună. Pentru a face acest lucru, tăiați vârful tubului, îndoiți-l în lateral, aplicați adeziv PVA în partea de jos și introduceți tubul în orificiul florii. Coborâți-l și apăsați astfel încât zona cu lipici să adere bine. Dacă folosiți un bețișor de kebab în loc de tub de hârtie, puteți lipi hârtie de vârf, sau legați o sârmă acolo, sau aplicați lipici bun, de exemplu, cu un pistol de lipici. Toate acestea se fac pentru a se asigura că florile nu alunecă de pe tub sau frigărui.


Lipiți toate florile mari de dimensiune A mai întâi aplicați lipici pe tub, apoi întindeți floarea pe acesta. Încercați să faceți distanțe mici între flori, nu mai mult de 3-4 mm. Datorită lipiciului, florile vor fi ținute într-un anumit loc fără a se muta într-un singur morman.

Lipiți toate florile de mărimea B și C în același mod și lăsați câteva dintre ultimele mici, mărimea D.

Tăiați tubul în exces și lipiți deasupra o floare mică. Apoi strângeți ultima floare în centru, astfel încât să se umfle bine și completați conul de hârtie cu ea.

Așa a ieșit frumos, aproape ca în realitate.


Puteți face o crenguță pentru el.
Ramă de pin sau molid din hârtie ondulată
Materiale pentru ramură:
- Hârtie ondulată verde;
- baton de kebab;
- Lipici, foarfece.

Cum să faci o ramură de pin sau molid din hârtie?
Tăiați o fâșie lungă de hârtie creponată. Am făcut o ramură foarte mică, dar dacă aveți nevoie de mai multe sau două, fâșia ar trebui să fie pe toată lungimea hârtiei.

Îndoiți-l de câteva ori și tăiați-l în fâșii subțiri pe o parte, undeva până la mijloc sau puțin mai mult.

Veți obține un franjuri ca acesta.

Acum toate aceste dungi trebuie răsucite în ace subțiri. Doar răsuciți într-o direcție cu două degete și hârtia se va ondula.


Aplicați adeziv pe vârful hârtiei ondulate și fixați-l pe partea superioară a beței de kebab.

Apoi, înfășurați această panglică în jurul unui băț, mergând puțin mai jos cu fiecare rotire.
La final, fixați cu lipici. A trebuit sa scurtez putin bataia, dar daca vrei o ramura mai lunga, continua sa lucrezi pana la capatul batului. Gata, ramura de pin sau molid din hârtie ondulată este gata.
Copacul de Anul Nou este, desigur, principalul atribut al celei mai importante sărbători de iarnă. Nu te vei putea descurca fără frumusețea pădurii, atmosfera nu este aceeași și unde va pune bunicul amabil cadourile? Se întâmplă că oamenii din casă împodobesc un brad de Crăciun pentru sărbătorile de Anul Nou: unii oameni pun unul viu, alții preferă unul artificial, iar alții preferă unul de hârtie.
Un brad de Crăciun din hârtie nu poate înlocui doar un brad cu ac, ci poate fi folosit și ca decor pentru brad de Anul Nou, un cadou unic pentru rude sau pur și simplu să împodobească biroul tău, amintindu-ți de weekendul care vine!
Am adunat pentru tine cele mai interesante opțiuni pentru brazi de Crăciun din hârtie pe care îi poți realiza cu propriile mâini.


Vedeți mai multe meșteșuguri din hârtie:

Timpul curge inexorabil înainte și acum muște albe zboară pe lângă fereastră, căzând încet la pământ și acoperind totul în jur cu o pătură pufoasă albă ca zăpada. Cu toate acestea, în ciuda frigului, sufletul meu este cald și vesel. Și totul pentru că apariția bruscă a fulgilor de zăpadă anunță venirea Anului Nou. Cea mai importantă sărbătoare a anului este deja foarte aproape, ceea ce înseamnă că este timpul să ne gândim […]
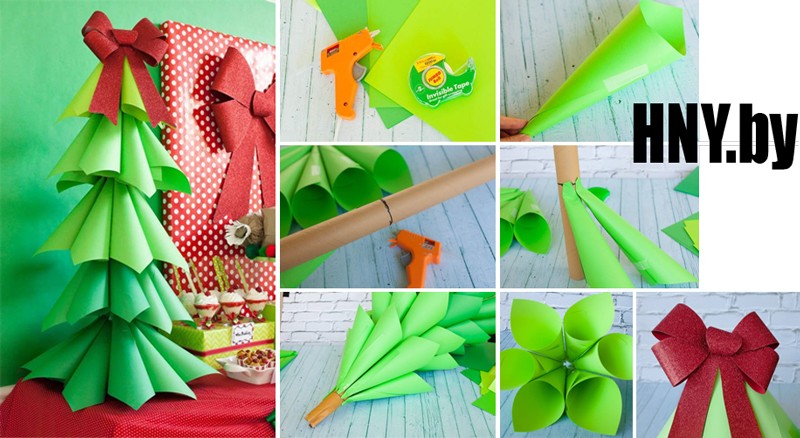
# 6 Brad de Crăciun făcut din hârtie de împachetat


# 8 Pom de Crăciun simplu din hârtie colorată


# 13 Pom drăguț de Crăciun care îți va decora desktopul


Te-ar putea interesa:

Dintre toată varietatea de sărbători luminoase, colorate și pline de suflet, poate cea mai iubită și așteptată de mult este Anul Nou. Datorită acestei sărbători, întreaga familie se poate reuni, se poate relaxa și se poate distra. Dar nu este doar atât. Anul Nou este învăluit într-o atmosferă specială creată de decorațiuni festive din interior. Puteți începe să vă planificați pregătirile pentru Anul Nou în avans. Pentru aceasta […]

#16 Pom de Crăciun din hârtie pentru femeile de aci cu răbdare: clasă de master


#26 Brad de Crăciun din hârtie cu efect de zăpadă

#27 Brad de Crăciun din hârtie folosind tehnica japoneză

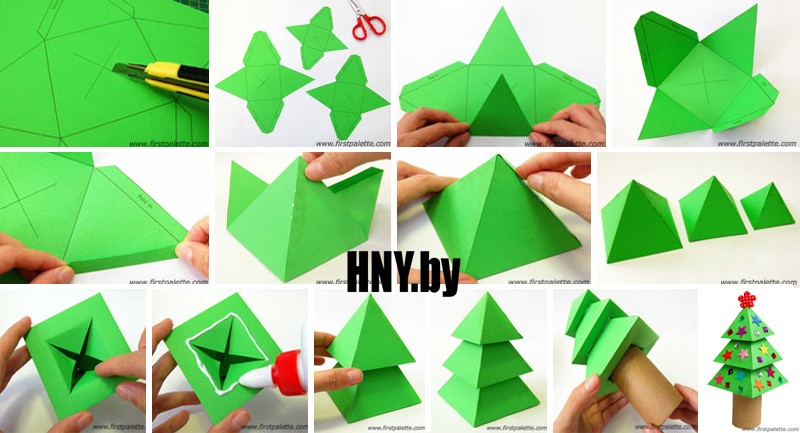
#28 Brad de Crăciun din piramide de hârtie
# 29 Un pom de Crăciun simplu din hârtie pe care chiar și copiii îl pot face
Anul Nou este cea mai preferată sărbătoare a celor mai tineri locuitori ai casei. Nu-i privați de bucurie și creați împreună un decor frumos. Pentru un astfel de brad de Crăciun veți avea nevoie de hârtie groasă pentru bază, multe cercuri de hârtie colorate și lipici.

Și iată o altă frumusețe de pădure de hârtie pe care copiii se pot descurca să o facă. Ei bine, creativitate comună cu părinții - ce ar putea fi mai bun pentru micii agitați!

Model de stea
#32 Pom de Crăciun 3D din hârtie: realizarea unui brad cu copiii

# 33 Pom de Crăciun pufos din hârtie creponată

# 34 Cum să faci un copac origami de Anul Nou cu propriile mâini
#35 Brad de Crăciun din hârtie folosind tehnica origami
# 36 Pom de Crăciun origami simplu
Ajutați-ne să îmbunătățim: dacă observați o eroare, selectați un fragment și faceți clic Ctrl+Enter.
Frumusețea pădurii din hârtie creponată. Clasa de master cu fotografii pas cu pas.
Alena Bastrykina, 11 ani, studentă a asociației „Meșteșuguri” la Centrul de Artă pentru Copii Lesnovsky.
supraveghetor: profesoară de educație suplimentară Novichkova Tamara Aleksandrovna MBU DO Casa Lesnovsky a creativității copiilor.
Descrierea postului: Clasa de master este destinată copiilor de vârstă școlară, profesorilor preșcolari, profesorilor de tehnologie, educatorilor și celor cărora le place să creeze meșteșuguri neobișnuite și creative cu propriile mâini. O frumusețe verde făcută cu propriile mâini va aduce multă plăcere și mare bucurie. Bradul de Crăciun va fi un cadou minunat de sărbători și va decora camera.
Scop: pentru o expoziție de meșteșuguri pentru Anul Nou, decorațiuni interioare.
Ţintă: Realizarea unui brad de Crăciun cu conuri de pin din hârtie creponată.
Sarcini:
- să intereseze și să te implici în munca de realizare a unui brad de Crăciun cu propriile mâini;
- consolidarea abilităților dobândite anterior în lucrul cu hârtie creponată;
- dezvoltarea abilităților creative individuale și a gustului artistic;
- dezvolta abilitatile motorii fine in timpul muncii;
- cultivați simțul frumuseții și al armoniei, independența în realizarea meșteșugurilor și acuratețea în muncă;
- cultivați o atitudine grijulie față de natură;
- creați o dispoziție festivă.
Materiale si instrumente:
- hartie creponata verde si maro;
- lipici Titan, creion lipici;
- baton de plastic pentru butoi;
- sârmă, foarfece;
- zapada artificiala - spray;

- suport pentru brad;
- spuma de plastic;

Locuiesc într-un sat numit Lesnoy. Acest lucru se datorează faptului că este înconjurat de pădure. Aceasta este în principal o pădure mixtă. Dar există suprafețe mari de conifere. Și molizi frumoși cresc pe teritoriul satului. Au fost plantate de primii locuitori ai satului lângă clădiri administrative, o școală, o Casă de Cultură, un spital, o grădiniță și în Parcul Victoriei. Au trecut mulți ani, pomii de Crăciun au crescut, iar pe tot parcursul anului frumusețile verzi se încântă cu ținuta lor. Iar în ajunul sărbătorii de Anul Nou, brazii de Crăciun se luminează cu lumini multicolore. Este atât de grozav! Bradul viu a devenit decorul satului. Îmi place să mă uit la molid. Și în fața ochilor mei apare un copac înalt, cu vârful săgeții care se întinde spre cer. În vârful capului vezi multe, multe conuri, iar dedesubt, ramuri puternice și în același timp grațioase răspândite în lateral. Miroase a ace de pin, iar o aromă minunată umple totul în jur. Molidul arată elegant și solemn în orice moment al anului. Din cele mai vechi timpuri, a devenit un obicei să ridicați un brad de Crăciun în ajunul Anului Nou. Dar trebuie să ne gândim că copacul plătește pentru această plăcere temporară cu viața sa. Trec mulți ani înainte ca un molid adult să crească dintr-o sămânță mică. Ploile îl udă, vânturile puternice îndoaie ramurile spre pământ, soarele arde delicatele ace verzi. Iar bradul de Crăciun încearcă să supraviețuiască, să supraviețuiască. Fiecare persoană ar trebui să cunoască legea privind protecția mediului și să încerce să salveze molidul de la tăiere.
Nici o frunză, nici un fir de iarbă!
Grădina noastră a devenit liniștită.
Și mesteacăni și aspeni
Cele plictisitoare stau în picioare.
Un singur brad de Crăciun
Veselă și verde.
Se pare că nu se teme de frig.
Se pare că este curajoasă.


Pentru a vă face să simțiți sărbătoarea de Revelion care se apropie, vă propun să faceți un brad cu conuri de pin din hârtie creponată.

Execuția pas cu pas a unui brad de Crăciun.
Prima etapă. Realizarea conurilor.
Luați hârtie maro și tăiați bucăți de 4 cm lățime de pe rolă. Taiem fasii de 15-20 cm lungime in functie de numarul de conuri. (Lungimea benzii depinde de dimensiunea conului)

Începem să rulăm hârtia. Puneți un colț, apăsând-l strâns cu degetele mâinii drepte. Încă o dată punem hârtia cu colțul îndreptat spre noi.


Ținem colțul cu mâna stângă, iar cu mâna dreaptă întoarcem hârtia departe de noi. Din nou, un colț spre și departe de tine. Se dovedește a fi o „cifră opt” sau un fel de zig-zag.


Rezultatul este o bandă răsucită ca aceasta. Vreau să spun că nu toată lumea poate face o astfel de întorsătură imediat. Dar dacă exersezi, cu siguranță vei învăța și vei obține o mare satisfacție. Această metodă de rulare a hârtiei face posibilă realizarea de flori frumoase.


Începem să formăm conuri. Aplicați puțin lipici pe marginea hârtiei, puneți o bucată de sârmă subțire și răsuciți banda de sus în jos.


S-a dovedit a fi un cucui atât de mic. Pentru a preveni desfășurarea hârtiei, lipiți vârful.

Facem multe conuri de diferite dimensiuni. Le lăsăm deoparte și trecem la etapa următoare.

Etapa a doua. Realizarea de ramuri pentru pomul de Crăciun.
Tăiați rulada în bucăți de 5 cm lățime.

Indreptam hartia si taiem fasii de 10cm, 15cm, 20cm lungime.

Îndoim fiecare bucată ca un acordeon și o tăiem dintr-o margine în fâșii înguste de 0,5 cm lățime, fără a ajunge la cealaltă 1 cm. Se pare franjuri.

Răsucim fiecare bandă cu degetele, transformând-o într-un „ac” subțire.

Facem multe din aceste pregătiri. Totul va depinde de cât de înalt va fi bradul tău de Crăciun și de cât de răbdător ai.

Din semifabricatele rezultate răsucim ramurile, înfășurându-le spiralat pe sârmă. Primim ramuri cu „ace”. Facem ramuri mai scurte pentru partea superioară a copacului și mai lungi pentru partea inferioară a copacului.


Colectăm crenguțe mici în ramuri, răsucindu-le cu sârmă


Să pregătim ramurile cu conuri. Luăm semifabricatul cu „ace” și înfășurăm conul de pin. Nu uitați să lipiți hârtia la capătul crengii și să o răsuciți cu degetele.


Colectăm crenguțe cu conuri în ramuri mari.


Facem o mulțime de ramuri cu și fără conuri pentru nivelul inferior al copacului.


A treia etapă. Asamblarea pomului de Crăciun.
Formăm coroana. Luăm o bucată lungă și înfășurăm trei ramuri mici cu conuri mici. Înfășuram firul cu o fâșie de hârtie verde, formând un trunchi.

Atașăm ramurile celui de-al doilea și al treilea nivel și învelim din nou trunchiul cu hârtie verde. Lăsați 5 - 6 cm între niveluri.

Pentru a face copacul gros, în rândurile următoare înșurubăm patru ramuri la trunchi

Pomul nostru de Crăciun este din ce în ce mai sus.

Să extindem trunchiul înfășurând strâns o altă bucată de sârmă groasă și decorand-o cu hârtie verde. Să mai adăugăm două niveluri.

Atașăm cele mai mari ramuri. Acesta este al zecelea nivel. Poți admira bradul de Crăciun în toată splendoarea lui. O punem într-un suport. Înălțimea copacului era de 60 cm. Această tehnologie vă permite să creați brazi de Crăciun de orice dimensiune. Principalul lucru este să vă aprovizionați cu hârtie, sârmă și, desigur, răbdare.


Să ne uităm la asta mai de aproape și din toate părțile.


Etapa a patra. Să instalăm un pom de Crăciun.
Tăiem cercurile de spumă la dimensiune, facem o gaură în ele și introducem bradul de Crăciun în suportul pregătit.


Instalăm bradul de Crăciun. Îndreptăm ramurile, îndreptăm „acele”.

Stropiți cu zăpadă. Stropiți ramurile cu zăpadă - pulverizați.


Bunicul Frost nu a trebuit să aștepte mult. A adus o pungă mare de cadouri.

Ne-am uitat la bradul nostru de Crăciun și am realizat că nu ne-am ales suportul potrivit pentru el. Un pic înalt. Am petrecut mult timp încercând oale și borcane. Noi am ales aceasta varianta.