
Costum DIY realizat din materiale reciclate pentru o fată. Costum DIY din materiale vechi
Adesea în institutii de invatamant sunt efectuate clase tematice sau spectacole de costume. Scopul lor este să le spună copiilor că există moda ecologică. Copiii învață să-și creeze propriile costume din material rezidual si in acelasi timp respecta, apreciaza muncă manuală. Sunt multe idei din care poți alege o ținută originală și frumoasă. Trebuie doar să cunoașteți tehnologia de execuție.
Realizarea unei ținute pentru un personaj de poveste, un super-erou sau un robot transformator din materialele disponibile este de fapt simplă. Este suficient să vă folosiți imaginația și să nu vă limitați la un singur tip de material. Lucrurile originale provin din:
- hârtie (ziare vechi, ambalaje de bomboane, cutii de carton);
- plastic (sticle, veselă de unică folosință);
- polietilenă (saci de gunoi, pânză uleioasă, pungi de ambalare);
- materiale naturale (frunze uscate, conuri, flori uscate).
Principalele avantaje ale creării unei ținute sunt disponibilitatea materialelor și ușurința în execuție. Cel mai adesea, costumul este asamblat literalmente din gunoiul care poate fi găsit în fiecare casă. Dezavantajele includ fragilitatea produselor și lipsa de confort în ele. Merită să înțelegeți că acestea sunt lucruri nu pentru uzul de zi cu zi, ci pentru spectacole sau jocuri.  Fabricat din plastic
  Fabricat din polietilenă
  Fabricat din material natural
Din ziare vechi
Procesul de fabricație
Când începeți munca, ar fi util să discutați cu copilul dvs. despre cine vrea să fie, ce materiale și-ar dori să folosească cel mai mult. Și pe baza preferințelor sale, pregătește fondurile necesare pentru realizarea unui costum neobișnuit.
Din cutii de carton
Cutiile sunt un material ideal pentru a crea un costum pentru un baiat. De exemplu, este foarte ușor să faci o imagine din viitor – un robot „de oțel”.
- Pentru a crea aveți nevoie de:
- două cutii (dreptunghiulare pentru corp, pătrate pentru cap);
- folie;
- scotch;
- foarfece;
- hârtie colorată;
- sârmă;
- lipici fierbinte;
guașă.
- Procesul de lucru va dura puțin timp, principalul lucru este să faceți totul pas cu pas. Cap. Părțile în exces sunt tăiate din cutie pentru a crea un cub cu trei laturi. Faceți un decupaj pentru față pe unul dintre ele. Acoperiți partea de sus a cutiei cu folie. Dacă doriți, faceți decorul sub forma unei antene mici (utilizați sârmă, hârtie colorată
- trunchi. Tăiați bucățile în exces, astfel încât cutia să nu aibă o bază inferioară. Tăiați o adâncitură în partea de sus pentru cap și pe laterale pentru brațe. Acoperiți cutia cu folie și folosiți hârtie colorată și guașă pentru a realiza decorul (nasturi, mini-ecran, dungi energetice).
- Picioare, brațe. Este suficient să puneți un costum obișnuit negru sau gri pe copil și să atașați mai multe elemente de folie cu bandă dublu-față.
Pe langa robot, din cutii pot fi realizate si urmatoarele costume pentru copii: cavaler, dinozaur, casa, piesa Lego, SpongeBob si altele.
Din sticle de plastic
Acest material vă permite să faceți rochii DIY incredibile pentru fete. Imaginile cu zâne de flori, sirene și prințese vor atrage micile fashioniste.
Pentru a face o rochie de sirenă trebuie să pregătiți:
- sticle de albastru, alb, culorile albastre(minim 20 buc.);
- scotch;
- lac de unghii (roz perlat);
- lipici Moment.
Procesul de lucru.
- Tăiați solzi ovali din sticle (4-5 cm pentru corset și 6-7 cm pentru fustă și trenă).
- Acoperiți elementele cu oja pentru a obține un efect de strălucire a culorii.
- Lipiți cântarul de bază (puteți lua o rochie veche). Acoperiți corsetul cu mici detalii, fusta și antrenați-le cu elemente mai mari. Aranjați-le la întâmplare, imitând solzi de pește.
- Faceți o coroană. Tăiați 3 flori din sticlele verzi și albastre. Pune cel albastru în cel verde și lipește-l. Înfășurați o pungă de plastic în jurul marginii, îndreptați capătul liber și pliați-o într-o formă de floare. Lipiți pe el 3 flori de sticle.
Când tăiați părți de costum, vă puteți răni cu ușurință pe marginile sticlei. Această etapă a muncii ar trebui să fie încredințată unui adult.
Costum din sticle de plastic Puteți face și unul pentru băieți (extraterestru, transformator, super-erou).
Din veselă de unică folosință
Acest material vă permite să creați costume pentru copii simple, dar eficiente. A face rochie de bal pentru o fată, aveți nevoie de următoarele materiale:
- pahare de plastic (in functie de inaltimea copilului, in medie 200 de bucati);
- capsator;
- scotch;
- fermoar;
- ață, ac.
Procesul de lucru:
- Corsaj. Tăiați paharele în jumătate și îndepărtați fundul. Așezați cele două părți una în cealaltă (cea de sus este cu 2 cm mai sus decât cea de jos) și fixați-o cu un capsator. Așezați părțile prinse rezultate în 2 rânduri de jos în sus până la înălțimea corsetului. Faceți părțile laterale și din spate din părți netede ale ochelarilor.
- Fusta. Ochelarii sunt adunați în etaje și fixați cu un capsator. Primul nivel este cel mai larg. Mai aproape de talie, fusta ar trebui să se conice din cauza reducerii numărului de ochelari.
- Asamblare. Coaseți fusta la corset folosind fire. Pentru a ascunde agrafele de pe fustă, puteți introduce una întreagă în fiecare ceașcă și o puteți fixa cu lipici.
Dacă utilizați ochelari de diferite culori, puteți aranja un mozaic (modare geometrice, flori, curcubee).
Din ziare vechi
Puțină imaginație și timp liber vă vor permite să faceți un costum chiar și din deșeuri, de exemplu, din ziare inutile. Este ușor să faci o fustă de balet din ele.
Instrumente:
- ziare;
- scotch;
- lipici;
- capsator;
- ață, ac.
Descrierea postului:
- Top. Înfășurați ziarul în jurul bazei de material, fixați-l împreună și coaseți-l. Orice rochie inutilă cu bretele poate fi folosită ca bază. Îndoiți ziarul ca un acordeon, îndreptați-l pentru a forma un evantai, atașați-l de corset și fixați-l cu fire ca decor.
- Fusta. Rulați foaia de ziar într-o formă de con și fixați-o cu un capsator în partea îngustă. Părțile rezultate trebuie să fie așezate în straturi, formând o fustă de balerină. Atașați fusta la bază folosind adeziv și un capsator. Dacă este necesar, marginile conurilor pot fi făcute mai texturate - tăiați aleatoriu zig-zaguri sau îndoiți în prealabil ziarul ca un acordeon.
Realizarea hainelor din deșeuri este un proces simplu și distractiv. Există multe variante de proiectare a unei rochii pentru o fată din ziare sau reviste. 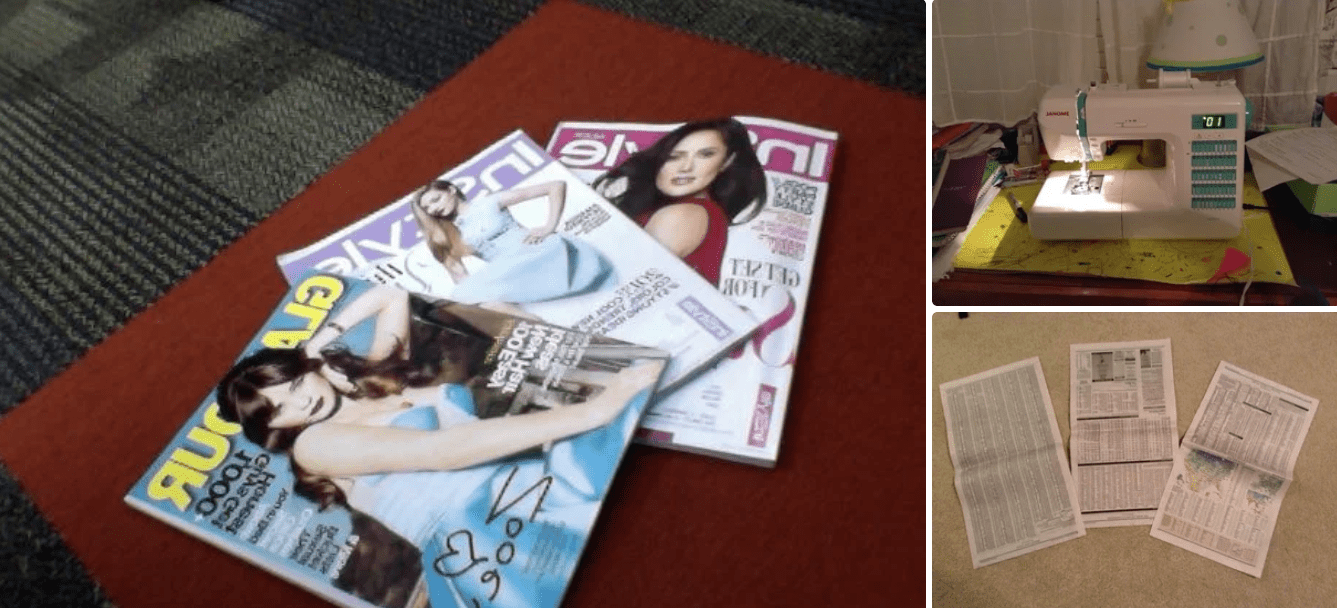 Materiale necesareși unelte
 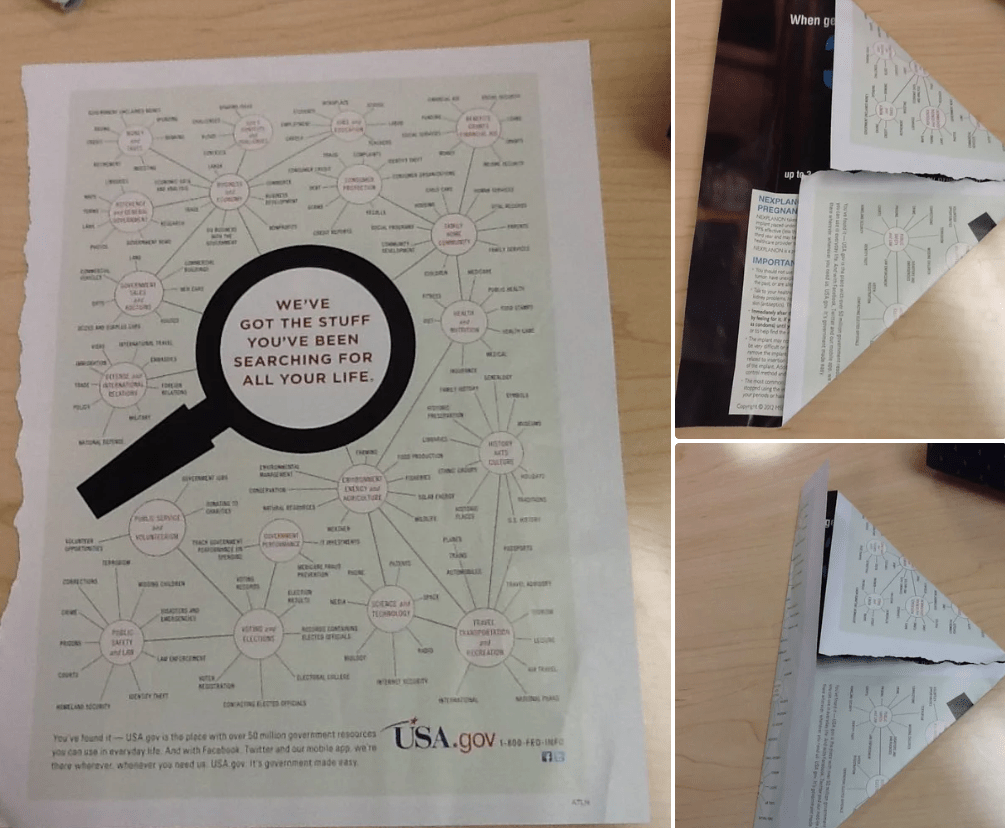 Pregătirea pieselor pentru fustă
  Triunghiurile pregătite trebuie conectate cu grijă între ele
 Decupați corpul liber din biscuiți
  O bucată dintr-un tricou vechi este atașată de spatele ziarului.
 Din saci de gunoi
Costum din saci de gunoi fă-o singur - cel mai ușor de făcut. Copilul va putea face față muncii chiar și fără ajutorul unui adult. Pentru a crea un costum de supererou Batman, aveți nevoie de:
- saci groși de gunoi negre;
- folie;
- foarfece.
Descrierea lucrării.
- Mantie. Tăiați două pungi mari pentru a crea un dreptunghi. Lipiți cele două părți rezultate în mijloc cu bandă adezivă (obțineți o pânză largă, uniformă). Tăiați semicercuri de-a lungul marginii mantiei pentru a da dreptunghiului forma unei aripi. băţ. Tăiați 4 panglici de 6-8 cm lățime din geantă Lipiți două dintre ele cu bandă sub formă de bucle pentru ca haina de ploaie să poată fi purtată peste umeri. Cele două panglici rămase sunt atașate de marginea mantiei, acest lucru vă va permite să o legați de încheietura mâinii copilului.
- Decor. Masca eroului este tăiată din același material. Apoi ar trebui să imprimați sau să desenați două embleme galbene de supererou, una lipită pe spatele pelerinei, cealaltă pe piept.
Orice băiat va fi mulțumit cu un astfel de costum eroic făcut din genți.  Materiale
  Piesa principală de prelucrat este realizată dintr-o pungă mare de plastic
  Preparate pentru margarete
  Trebuie să tăiați petalele din benzi
Din frunze uscate
Pentru a crea un costum din deșeuri inutile în toamnă, se folosesc frunze, ramuri și conuri de pin. Face rochie frumoasa pentru o fata in stil de toamna o poti face in cateva ore.
Materiale:
- frunze de arțar culori diferite si dimensiuni;
- parafină;
- ață, ac.
Descrierea postului:
- Tratați frunzele colectate cu parafină, astfel încât să nu se usuce (muiați fiecare frunză în parafină clocotită și puneți-o pe ziar până se usucă complet).
- Luați o rochie veche pentru bază, de preferință cu volan pe fustă. Coaseți frunzele la bază, astfel încât să nu se lase.
- Puteți țese o coroană din frunzele rămase și puteți adăuga ramuri strălucitoare de rowan.
Un costum de toamnă pentru copii arată foarte impresionant, iar frunzele tratate cu parafină nu se ofilesc sau se usucă mult timp.
Costumele realizate din materiale vechi pentru fete și băieți nu necesită costuri financiare mari și efort de realizat. Cu toate acestea, trebuie să vă amintiți regulile de siguranță:
- Merită să vă asigurați că copilul nu este alergic la materialele viitorului costum.
- Nu folosiți obiecte ascuțite sau periculoase care pot săpa în piele, să zgârie sau să provoace disconfort. Evitați piesele mici pe care un copil le-ar putea înghiți accidental.
- Înainte de a vă pune costumul, trebuie să vă asigurați că lipiciul este complet uscat și că mirosul său a dispărut complet.
Nu aveți încredere în copii, ace, foarfece, cuțite de papetărie și lipici fierbinte. Chiar dacă un copil știe să le manipuleze, un adult ar trebui să fie întotdeauna în apropiere și să supravegheze procesul de lucru.
Prin observarea acestora reguli simple, o activitate în comun cu fiul sau fiica dumneavoastră va aduce multă pozitivitate, iar un costum realizat din deșeuri îl va învăța pe copil să aprecieze natura, să fantezeze și să creeze.
Video
Puțină imaginație, puțin... lucruri inutile și chiar potențial gunoi și... rochia este gata!
Crezi că acest lucru este imposibil? Dacă o persoană vrea să creeze ceva neobișnuit și frumos, nimic nu o poate opri.
Ai încredere în tine și fă o ținută uluitoare din ceea ce poți găsi la mezanin, în colțul din spate al cămarei, sau doar la îndemână!
Ce sunt materialele improvizate
Orice materiale sunt potrivite pentru rochie, cu excepția celor grele și potențial periculoase: Sticlele de sticlă și bateriile uzate nu trebuie folosite.
O ținută de hârtie neagră nu va lăsa pe nimeni indiferent (foto)
Dar țesăturile uitate și articolele uzate sunt perfecte:
- orice tricotaje - tricouri, tricouri, cămași de noapte;
- șaluri, eșarfe, șaluri, pareouri, fețe de masă, perdele și tul;
- cămăși;
- blugi și alte lucruri.
Moștenirea de zdrență lăsată de la bunici și mame este o valoare de neînchipuit, mai ales având în vedere faptul că a revenit moda modelelor și țesăturilor din acei ani. din nou în vârful popularității.
Din țesături de epocă puteți crea minunate haine tradiționale rusești, care sunt demonstrate în noul sezon de către cei mai mari couturieri din întreaga lume.

Designul ecologic este acum la vârful popularității
Hârtia și derivatele sale plus lipiciul PVA reprezintă o extravaganță de culoare, gust și stil. Căutați singuri:
- reviste lucioase;
- hărți de lume și metrou;
- tapet;
- Hârtie de împachetat și ambalaje pentru bomboane;
- Hârtie de peisaj și colorată pentru meșteșuguri;
- carton (ondulat, acoperit, folie);
- bancnote (din circulatie sau fotocopiate, dar puteti folosi si reale) si va fi o rochie!

Banii pot fi folosiți și în scopuri creative.
Nu numai ținutele de zi cu zi sau de expoziție sunt realizate din materiale originale. Mulți designeri au surprins și continuă să surprindă publicul cu prăjituri, mănuși medicale și chiar prezervative. Cu toate acestea, cu siguranță nu ar trebui să ieși purtând asta. Pentru viata de zi cu zi Este mai bine să alegeți un alt designer.
Materialele naturale sunt o comoară de idei:
- frunze uscate;
- flori uscate;
- conuri;
- crenguțe;
- scoici;
- pietricele colorate etc.

Petale roz delicate - o mană divină pentru mireasă

Petalele de garoafa sunt utile pentru a crea un aspect festiv
Chiar și scândurile mici de lemn pot fi folosite atât ca decor, cât și ca element al unui corset sau ca bază pentru o fustă.
Pungi de plastic (gunoi, alimente, huse de pantofi), sticle și capace pentru acestea utilizat pe scară largă de către designeri care promovează respectul pentru natură.

Tinuta de seara realizata din genti negre
baloane- O bază excelentă pentru o rochie de sărbătoare.
Vechi jucării moi - nu este doar valoros blană artificială, dar și poliester de căptușeală, care poate fi folosit pentru a proiecta elemente voluminoase ale unei rochii.
Toate cele de mai sus pot fi utilizate fie individual, fie în combinație între ele. Deci decor materiale naturale Se atașează perfect de hârtie sau carton și arată și mai bine pe ele.

Chiar și un tel de bucătărie poate deveni o victimă a modei
Pentru o ținută și pantofi extravaganți, ar trebui să alegi altele non-triviale. Găsiți totul despre stil aici.
De ce ai avea nevoie de o ținută atât de originală?
Astfel de toalete sunt necesare pt:
- concursuri creative;
- muncă, dacă ești animator pentru copii, trebuie să faci reclamă la ceva;
- balul de bal;
- petreceri costumate tematice;
- producții teatrale de amatori, inclusiv cele școlare și studențești.

Capodopera ziarului
Rochiile din materiale vechi sunt necesare pentru frumusețe! Pentru a protesta împotriva utilizare irațională resurselor naturale și demonstrându-și potențialul creativ.
Dacă te hotărăști să reînvie hainele vechi, le poți purta în fiecare zi. Poți chiar să-ți asumi un risc și să coasi o ținută pentru o sărbătoare, de exemplu.
Rochii pentru ocazie specială caută .

Dați o nouă viață blugilor vechi
Tinuta confectionata dintr-o bucata de material (pareo, esarfa)
- materialul trece pe spate, trece pe sub axile, capetele se încrucișează în față, se ridică, se înfășoară în jurul gâtului și se leagă la spate.
- mijlocul piesei se pune sub axilă, capetele se leagă pe umăr pe partea opusă sau se răsucesc pe partea opusă sub axilă, se ridică până la umăr și se fixează acolo.
Toate opțiunile pot fi îmbunătățite prin adăugarea unei curele, iar capetele pot fi asigurate cu un ac de păr decorativ.
Conform schemelor propuse, puteți realiza un model cu mai multe straturi folosind două sau trei tăieturi, plasând mijlocul pieselor unul față de celălalt.

Diagrama ținutei eșarfă de mătase
Tricou și discuri laser
Un tricou vechi și o grămadă de discuri laser nedorite pot fi transformate într-un costum de vedetă de petrecere cu o mișcare de ac. Instrumente necesare- awl, foarfece, ac și ață.
În fiecare disc se face o gaură cu o punte încălzită pe gaz.
Este recomandabil ca tricoul să fie sub nivelul șoldului. Partea de sus este în curs de actualizare. Opțiuni de procesare a manșonului:
- tăiați de-a lungul cusăturii și coaseți discurile (cu două găuri) pe umeri în felul curelelor de umăr;
- tăiate în fâșii de aproximativ 1 cm lățime Capetele pot fi legate în mai multe rânduri în perechi într-un model de șah, formând o plasă;
- Atașați un disc în față, lateral și spate;
- treceți firul de spandex (întindere) de-a lungul marginii mânecii și trageți-l. Veți primi o „lanternă”.

Opțiune excelentă pentru un club
O idee grozavă pentru un club este un tricou și o fustă din discuri sidef.
Dacă mânecile au fost tăiate, puteți face același lucru cu partea principală a tricoului. Fantele pot fi coborate de la decolteu la linia bustului, de la linia de sub bust pana la talie, sau putin mai jos.
Este important să faceți tăieturi de-a lungul firelor verticale.Țesătura va fi înfășurată în tuburi, care pot fi lăsate libere, iar discuri pot fi „țesute” în ele.
Întindeți-vă cu atenție  Tricou și începeți să coaseți pe „sânzile” discurilor, începând de la marginea de jos. Încercați să le atașați simetric pe întreaga circumferință a tricoului. Cusăturile pot fi ușor modificate dacă discurile sunt poziționate inițial puțin mai sus în față decât în spate.
Coaseți al doilea nivel astfel încât discul superior să-l acopere pe cel inferior să puteți combina mijlocul laserului superior cu locul în care se ating cele inferioare; Al treilea și următorul nivel sunt cusute în același mod.
Opțional, construiți-l pe lateral sau în spate. Discurile pot fi asamblate fie pe fire, fie pe o bucata separata de material (esarfa, plasa de plastic).
Unele dintre discuri pot fi acoperite cu bucăți de saci de gunoi colorați, acestea pot fi înlocuite sau completate cu cercuri tăiate din sticle de plastic.
Luciu vechi într-un aspect nou
Toaleta de petrecere se coase cu propriile mâini folosind un tricou vechi, ziar și foi lucioase (broșuri publicitare, gloss pentru femei sau bărbați).

Opțiune pentru tinerii creativi
Instrumente și materiale: maşină de cusut, fermoar pe toată lungimea produsului pentru a se potrivi și aceleași fire, foarfece.
Separați foile lucioase și sortați-le după culoare, câte 9 foi, câte 3 foi pentru negru.Îndoiți fiecare într-un triunghi, pliând colțurile spre centru de-a lungul laturii lungi. Îndoiți marginile de la baza triunghiului, retrăgându-vă cu 3-4 cm.
Întindeți țesătura fustei din triunghiuri:
- asamblați primul rând, cusă-te;
- așezați pe al doilea deasupra astfel încât triunghiurile superioare să acopere jumătate din cele inferioare;
- coase al doilea rând astfel încât cusătura să o acopere și pe cea de jos;
- repetați până obțineți lungimea dorită de material.
Lățimea rândului de triunghiuri nu trebuie să fie mai mică decât circumferința șoldurilor plus 4 cm.

Iată încă câteva modele pentru creativitatea „de ziare”.
Rulați foile negre într-o bandă, îndoiți-o în jumătate și coaseți-o pe materialul fustei. Rezultatul este o centură.
Îndoiți trei foi de ziar suprapuse, trageți pe ele conturul vârfului (puteți face pliuri decorative) și decupați-l. Tăiați tricoul în mijlocul spatelui, plasați un corset de ziar de-a lungul părții din față, care ar trebui să fie cusut pe material.
Conectați fusta și corsetul. Coaseți un fermoar de-a lungul marginilor.
baloane
Se vor folosi în cea mai mare parte bile lungi din care sunt făcute figurine. După ce ridicați corsetul, formați fusta. Pentru a conecta elemente individuale, utilizați fire, împletirea bilelor în sine și bandă.
Utilizați bile ovale pentru decor, trenă sau fustă.
Nu este necesar să umflați baloanele până la capăt. O minge ovală ușor umflată poate fi transformată într-un buton original trăgând butonul până la un nod și fixându-l acolo cu un alt nod. Lipiți o minge mai mică în centru.

Mingile sunt o mană divină pentru fashioniste curajoase
Saci de gunoi
Asamblați un corset dintr-una sau două genți. Fusta poate fi asamblată:
- într-o fustă dreaptă, conectând două genți de-a lungul cusăturilor laterale. Puteți atașa clapele în formă de romb deasupra, lipindu-le secvențial conform modelului solzi de pește, începând chiar de jos;
Creați dacă doriți. Puteți face o apariție triumfătoare în ea, de exemplu, la o petrecere a tinerilor designeri.
frunze căzute
Baza este un tricou vechi. Materialul principal sunt frunzele uscate întregi.
Frunzele sunt atașate de corset cu fire. Decor – coroane de frunze ca curele – una sau două.
Un element similar poate fi plasat de-a lungul fundului fustei sau de-a lungul centurii. Partea inferioară este asamblată din frunze, începând de la rândul de jos cu o suprapunere.
Particularitatea produsului este că frunzele se usucă rapid, se ofilesc și devin fragile, așa că o astfel de ținută ar trebui făcută cu o zi înainte de afișare. Condițiile optime de depozitare sunt o cameră întunecată, răcoroasă, cu stropire periodică a frunzelor cu apă.

Frunze de toamna
Video
Acest videoclip vă va spune despre varietatea de rochii realizate din materiale improvizate.
Îndrăznește și o vei face! Uită-te la meșteșugurile altor meșteri, uită-te în jur și fă mai bine. Dacă ar exista o femeie, și-ar face propria ținută.
Un eveniment plăcut a apărut pe neașteptate - un bal mascat! Nu ai timp sau bani să comanzi de la o croitorie sau să alergi prin magazine în căutarea costumelor originale! Ce să fac?! Ei bine, în primul rând, calmează-te, în al doilea rând, amintiți-vă că putem face totul cu propriile mâini și, în al treilea rând, uitați-vă în jur. Ce avem mereu multe acasă? Corect! Sticle de plastic, ziare, saci de gunoi, cutii. Din aceasta îl vom face pe cel mai original cu propriile noastre mâini. costum de carnaval.
Din sticle de plastic
Sirenă sau kikimora
Cel mai mult loc frumos pentru o sticlă de plastic acesta este fundul. Le tăiem multe deodată. Vor decora tivul rochiei, corsetul și le poți folosi pentru a lipi o coroană originală. Pentru un costum de sirenă sau kikimora vom avea nevoie de sticle verzi.
După ce tăiați fundul, mai trebuie să tăiați gâturile și apoi tăiați cu grijă și uniform restul sticlei pe lungime, în trei părți egale. Ardeți găuri mici în partea îngustă și adunați-le pe un șnur într-o ghirlandă, care va deveni o fustă. Lipiți, coaseți sau capsați fundul de-a lungul marginii fustei.
Este mai bine să faceți corsetul rochiei acoperind un tricou vechi cu părți de plastic verzi. Dar coroana poate fi asamblată din pene luxuriante tăiate din sticle și atașate la un cerc sau o panglică.
Prințesa florilor
Fusta în picioare pentru acest costum este realizată din cadru de sârmă. Orice material subtire poate fi intins peste el. Aici se termină dificultățile și începe partea creativă. Tăiați petalele din sticle de diferite culori, colectați-le în flori și atașați-le de fustă. Tăiați sticle de jumătate de litru într-o spirală și atașați „șarpele” de fustă.

Astronaut
Costumul unui băiat poate fi realizat din materiale vechi, prin simpla legătură a două sticle de plastic și atașarea lor cu capul în jos pe spatele astronautului folosind curele. Pentru a face jetpack-ul nostru funcțional, lipiți cu propriile mâini pete roșii-portocalii care simulează focul în gât.

Cască, pălărie, coroană
Cele mai mari sticle de plastic sunt pur și simplu produse special pentru a face din ele diverse căptușeli pentru un erou, un extraterestru, un rege, un domn, un puroi cu cizme etc.

Fotografia arată cum să faci aceste pălării. Decupați câmpurile din carton gros.

Costume de la…
Rochie din frunze
Este destul de firesc să mergi la balul de toamnă într-o rochie din căderea frunzelor de toamnă. Pentru a crea o astfel de capodoperă cu propriile mâini, veți avea nevoie de puține resurse: doar o bucată de material sau o rochie veche, o geantă mare frunze de arțarși lipici.
Este bine dacă frunzele sunt puțin umede. Dacă se usucă, marginile se vor ondula, iar rochia va deveni „shaggy”. Pulverizați-le cu puțină apă de la pulverizator și începeți să le lipiți de material.

Faceți acest lucru de jos în sus, suprapunând rândul anterior. Încercați să îndurați schema de culori. Puteți îndrepta frunzele folosind un fier de călcat cald, călcându-le prin tifon umed.

Aceasta rochie este foarte frumoasa, dar nu rezistenta. Dacă nu ai de gând să-l porți imediat la minge, pulverizează-l ușor la fiecare 4-5 ore cu apă rece, astfel încât umezeala să nu ajungă pe țesătură.

Rochie confectionata din genti
Luați saci de gunoi de două culori, tăiați-i într-o foaie continuă și construiți un costum... pentru ploaie, de exemplu.

Rochiile realizate din materiale improvizate sunt uimitoare. Puțini oameni știu că pungile, chiar și cele mai mari, sunt lipite atât de strâns încât pot fi umflate ca baloane. Umflați 15-20 de pungi și atașați-le fusta lunga pe mai multe rânduri. Lumea nu a văzut niciodată o prințesă atât de minunată.
Puteți, dimpotrivă, să nu umflați pungile, ci să le tăiați în franjuri și apoi să le coaseți cu volane roșii luxuriante.

Regina tiparurilor ziarelor
Dacă aveți stive de vechi, citiți ziare întinse în jur, așteptând următoarea reparație, este timpul să le puneți la treabă. Vezi ce fel de rochie regală a Doamnei Pecetei poți face cu propriile mâini. Tot ce trebuie să faceți este să luați o foaie imprimată, să o pliați în jumătate pentru rigiditate, să o rulați într-o pungă și să o atașați de fustă în orice fel. Procedura de asamblare este aceeași ca la costumul de toamnă.

Dinozaur și box cowboy
Un costum grozav de dinozaur poate fi făcut din cutii. Puteți fixa piesele cu un capsator, lipici sau bandă adezivă. Acest lucru necesită imaginație și inginerie.

Un alt costum de carnaval pentru un băiat este un cowboy pe cal. Fața calului poate fi făcută din aceleași sticle de plastic. Păcat că este dificil să dansezi în cerc în astfel de ținute și nu poți invita o fată la un vals, ci un cadou pentru cel mai bun costum asigurat.

Costum de extraterestru
Cea mai profitabilă ținută este rochia extraterestră. Da, pentru că nimeni nu știe cum arată cu adevărat. Vino cu orice vrei, taie-l cu propriile mâini, lipește-l, desenează tot ce-ți permite imaginația. Pentru a indica că porți un costum de extraterestru, pur și simplu atașați o antenă la cap și vopsiți-vă fața în verde.

Nor
Costumul nor este realizat din poliester capitonat. Luați o cârpă albă sau o față de pernă veche.

Faceți o gaură în ea pentru cap și coaseți o mulțime de puf sintetic alb. Colanții albi vor completa aspectul.
Vrei să faci o rochie elegantă și originală din saci de gunoi, ambalaje de cip și ziare în câteva ore? Asigurați-vă că acest lucru este posibil.
Rochie DIY din genți

Astfel de rochii de seara se fac foarte repede. Luați un sac de gunoi negru cu o capacitate de 120 de litri. Pentru prima probă, trebuie să tăiați punga de jos și să o puneți pe voi. Pentru a vă asigura că se potrivește perfect în partea de sus, legați-l aici cu șiretul.
Pentru astfel de modele, este mai bine să luați saci de gunoi cu legături. Le puteți așeza sus sau jos. Cu a doua opțiune, veți obține o fustă balon.
Tot ce mai rămâne de făcut este să-l îmbraci centura lata, iar rochia din genti este gata. Puteți purta acest lucru la o petrecere tematică sau la bal de școală. Uneori, instituțiile de învățământ organizează concursuri pentru rochii făcute cu propriile mâini din materiale vechi. Aceasta va fi doar o cale de ieșire din situația de la un carnaval, deoarece nu este nevoie de aproape nimic pentru a-l crea și se face foarte repede.
Pentru al doilea model, geanta este drapată cu bandă în partea de sus și de jos. Umărul celei de-a treia rochii este colțul pachetului. Se poartă asimetric și este, de asemenea, drapată cu bandă. Veți crea restul elementelor noi afișate în fotografie în același mod din același material.

Dacă aveți doar 10 minute de timp, de asemenea:
- sac de gunoi cu șnur;
- scotch;
- dorinta de a face un lucru nou.
Rochie de seară luxuriantă

Dacă ai un tricou care se potrivește cu celofanul, folosește-l pentru a crea topul. Apoi atașați o agrafă la mâneci sau coaseți o floare făcută cu propriile mâini din resturi de pungi. Pentru a face acest lucru, veți avea nevoie de o bandă de celofan de 8-12 cm lățime și aproximativ 50 cm lungime. Îndoiți-o în jumătate pe lungime, astfel încât nivelul de sus să fie mai scurt decât cel de jos și adunați banda pe un fir.
Asigurați-vă că firul nu sare afară. Pentru a face acest lucru, pliați-l în jumătate, faceți un nod impresionant și treceți un ac între două secțiuni de fir. Când ați cusut toată panglica, strângeți-o cu grijă, tăiați firul și legați 2 părți din ea cu un nod.
Floarea este gata. Puteți coase o fustă din genți de orice dimensiune. Dacă sunt mici, umflați-le pe fiecare și faceți un nod în partea de sus. Faceți o fustă dreaptă sau ușor evazată dintr-un sac de gunoi mare. Atașați fiecare pungă de el cu bandă în partea superioară. Dacă baza fustei este din material textil, coaseți-o cu un fir și un ac.
Saci de gunoi dimensiune mare va adăuga, de asemenea, fast unei ținute extravagante. Mai întâi umflați fundul pungii, apoi răsuciți-l și legați-l în nod. Umflați următorul sector superior. Leagă-l și pentru a-l separa de următoarea, a treia parte. Apoi atașați întregul lanț de sectoare umflate ale sacului la bază.
Nu este necesar să faceți lucrul nou negru. Daca ai pachete culoare albastră, vei obține o ținută la fel de șic.
Rochie eleganta pentru fata facuta din pachete

Pentru o tânără fashionistă, poți folosi și acest material neobișnuit. Iată avantajele sale:
- nu se sifoneaza (nu este nevoie sa calcati);
- puteți folosi diferite culori;
- draperii rapid;
- spala bine (nu este nevoie de spalare);
- economic deoarece este ieftin;
- noul articol este creat în câteva minute.
- pungi de culori galben și albastru;
- ață cu un ac sau bandă;
- scotch;
- stilou cu pâslă.
Sforul va fi ținut ulterior de gât, fixând astfel rochia de corp. Ca sa se potriveasca perfect si pe spate.
Acum măsurați distanța de la talia copilului până la vârful genunchilor. Această lungime vă va oferi o fustă cu mai multe niveluri. Fie aceasta valoarea „A”. Stivuiți pungile unul peste altul, măsurați dimensiunea „A”, tăiați. Dacă gențile sunt lungi, atunci puteți face mai multe fuste dintr-una.
Atașați prima bandă cu două fețe în partea de sus pentru a crea volane. Lipiți sau coaseți această parte pe talia piesei de prelucrat, iar următoarea deasupra. În același mod, faceți toată partea inferioară a rochiei fetei.
Pentru a face fusta pufoasă și a arăta impresionant, prelungește-o pe cea de jos. Fiecare detaliu ulterior este puțin mai scurt decât cel anterior. Apoi, fusta rochiei va arăta ca ținuta dansatorilor de sală.
Sort pentru fete
Terminând subiectul sacilor de gunoi, ar trebui să vă spunem cum le puteți folosi pentru a face un șorț impermeabil. Este indispensabil atunci când modelați din plastilină, argilă polimerică, în bucătărie. Frumusețea unui astfel de produs este că este rapid de făcut și ieftin, așa că poți face un șorț pentru o fată chiar și în fiecare zi.

Modelul șorțului prezentat demonstrează în mod clar cum să faci acest articol de neînlocuit cu propriile mâini. Îndoiți geanta albastră în jumătate pe lungime, faceți un decupaj lângă pliul de sus pentru decolteu, iar pe cealaltă parte pentru brațe. Desfaceți produsul și puteți încerca șorțul pe o fată. Aceasta este ceea ce primești.

Vă rugăm să rețineți că cusăturile laterale și de sus de pe geantă trebuie lăsate, apoi șorțul va fi continuu pe umeri și laterale și se va ține bine împreună.
Rochie făcută din ziare
Iată o altă opțiune pentru realizarea unei ținute din materiale improvizate.

Această rochie făcută din ziare arată grozav, iar o fată în această rochie va deveni o podoabă. bal de școală, orice altă sărbătoare. Va dura puțin mai mult timp pentru a face un lucru nou decât pentru modelele anterioare de celofan, dar va merita.
Iată care sunt materialele pe care le vei folosi când lucrezi:
- ziare;
- Velcro subțire;
- centura;
- creion;
- riglă lungă;
- rechizite de cusut.
Îl luăm pe primul și începem să facem contra falduri pe el. Lăsați 1,5 cm de la margine, îndoiți-l, întoarceți ziarul și îndoiți următoarea fâșie la 2,5 cm lățime.

Acum intoarceti foaia din nou si faceti un pliu lat de 1,25 cm In acest fel, decorati intregul ziar dublu. Călcați-l cu un fier de călcat nu foarte fierbinte sau cu grijă cu mâna pentru a defini clar pliurile. Iată cum se pliază pe hârtie.

Apoi, atașați semifabricatul la dvs. sau la modelul pentru care coaseți o rochie, marcați linia taliei și coaseți de-a lungul acestui marcaj pe o mașină de cusut.
În același mod, faceți părți din ziarele rămase, împăturite în perechi și coaseți spațiile de-a lungul cusăturii laterale.

Pune mini-rochia rezultată și leagă-o cu o curea. Fixați pliurile în partea de sus și conturați decolteul.

Coaseți pliurile mai întâi de-a lungul vârfului ziarului, apoi de-a lungul decolteului și tăiați excesul cu foarfecele.

Acum încercați din nou această parte, trageți o linie pentru armuri, tăiați conform marcajelor.

Pentru a vă asigura că rochia dvs. cusută manual se potrivește bine, se fixează și se potrivește bine, coaseți o bandă lungă cu velcro pe spatele unei jumătăți a spatelui și pe cealaltă.
Faceți fusta chiar și tăind excesul.

Acum măsurați lungimea curelelor, tăiați-le dintr-o fâșie de ziar pliată în jumătate în cruce. La joncțiune, pliați încă 5-7 mm pe fiecare parte pentru cusătură și cusătură.

Coaseți curelele în față și în spate, mai întâi încercând-le și fixându-le.

Partea de sus a ținutei și fusta sunt gata.

Acum trebuie să coaseți un jupon, apoi rochia de hârtie va fi pufoasă și de lungimea necesară. Pentru a face acest lucru, desfaceți ziarele într-un singur strat. Coaseți fiecare de-a lungul partea superioară, punând pliuri la întâmplare. Când s-a terminat primul ziar, luați al doilea, suprapuneți-l pe cel anterior cu 10 cm, cusați și el în partea de sus cu pliuri, apoi folosiți alt ziar. Luați câte aveți nevoie pentru a coase un jupon.
Mototolește ușor ziarele cusute deasupra și coase-le din nou, plecând la 1 cm de cusătură.

Coaseți Velcro pe marginea superioară pe una și pe cealaltă parte, astfel încât juponul să poată fi pus și scos cu ușurință.

Apoi, îndoiți ziarul de mai multe ori la o lățime de 10 cm pentru a tăia o centură strânsă. Coaseți-o pe toată lungimea pe o parte și pe cealaltă, coaseți Velcro la capete, după care cureaua este gata și rochia în sine, făcută din ziare, făcută cu propriile mâini, este și ea gata.

Un alt stil de ținută realizat din ziare

O astfel de ținută extravagantă va fi indispensabilă la o petrecere tematică de Halloween.
Pentru partea de sus, trebuie să tăiați ziarul dublu astfel încât să acopere corsetul și să-l cusați, tăind excesul. Corsetul va deveni atât o curea, cât și partea superioară a rochiei. Pentru a face o fustă, va trebui să rulați multe bile de ziar, asigurând colțul fiecăreia cu un capsator, astfel încât hârtia să nu se desfacă. Acum, folosind același instrument, conectați pungile împreună pentru a forma o fustă.
Baza rochiei poate fi cusuta din stofa, din ziar dublu sau dintr-un sac de gunoi. Pungile sunt atașate de aceste materiale cu un capsator sau bandă, care se transformă în curând într-o fustă lungă pufoasă.
Hârtia va ajuta, de asemenea, la realizarea unui guler mare. Puneți mai multe ziare unul peste altul și tăiați din ele un cerc. Găsiți-i centrul, tăiați o gaură rotundă în interior, puțin mai mare decât diametrul gâtului. Acum faceți o tăietură din el până la marginea cercului, desfaceți piesele de prelucrat. Atașați pungi de hârtie între ele. Coaseți o parte a gulerului la stânga și cealaltă la cupa din dreapta a corsetului.
În concluzie, trebuie să faci o floare originală din hârtie, cuie din ziare, iar ținuta unui vampir fermecător sau a unei alte doamne de poveste este gata.
Ținute moderne realizate din pachete de cipuri
Acest lucru este, de asemenea, ușor de făcut. Dacă ai un tricou inutil, o rochie veche, dar preferată, aceste lucruri vor servi drept bază.
Spălați pungile cu chipsuri și coaseți-le pe rochia veche.
Dacă utilizați un tricou, mai întâi decupați juponul din țesătură, coaseți-l de el și apoi atașați pungile la bază.
Ele pot fi cusute răsturnându-le pe dos. Apoi rochia din genți se va dovedi a fi într-o singură culoare, strălucitoare. Dacă doriți, potriviți modelul atașând pungi de aceeași culoare în rânduri sau într-o ordine diferită. Asta vei primi atunci.

Puteți face fusta mai plină atașând la ea un recipient care foșnește, preumflat și legat cu benzi elastice.
O altă opțiune: tăiați pungile pe lateral, coaseți-le unul pe celălalt pe o mașină, creând o țesătură solidă. Acum poți crea o rochie din ea folosind un model sau draperii gențile la discreția ta prin fixarea materialului pe spate cu Velcro.
Acestea sunt genul de ținute originale pe care le poți crea rapid din materiale pe care le ai mereu la îndemână. Un astfel de halat va costa un ban, dar va arăta extravagant și șic!
Urmăriți un videoclip despre cum să creați rapid o ținută originală folosind materiale improvizate:
1. COSTUME DE CASĂ PENTRU MASCARADE, CARNAVALE ȘI ALTE EVENIMENTE DE SĂRBĂTORI
Produse lucrate manual va fi întotdeauna evaluat mai mult decât omologii standard cumpărați din magazin. Haine elegante, creată cu grijă de mâinile acilor după silueta ta, va sublinia fiecare curbă, fiecare linie a corpului tău. O costume drăguțe pentru bebeluși iar rochiile vor ajuta la transmiterea individualității micuței fashioniste.
Talentul unei cucernice este solicitat mai ales în ajunul unora eveniment pentru copii. Fiecare copil își dorește să poarte un costum original să te transformi în persoana iubită erou de basm pe viitor carnaval, mascarada sau la orice alt eveniment tematic. Și nu este deloc necesar să știi să coasi sau să tricotezi profesional pentru ca copilul tău să aibă ocazia să poarte un costum frumos potrivit pentru vacanță. Puteți face un costum tematic minunat din materiale vechi cu propriile mâini!
În materialele anterioare v-am povestit cum puteți face rochii, costume și accesorii pentru a decora haine de sărbătoare acasă cu propriile mâini din deșeuri. Unele costume pentru copii pentru carnaval sau mascarada pot fi realizate în doar câteva ore!
În acest articol veți găsi cursuri de master cu fotografii și lecții video care vă vor ajuta să vă pregătiți petrecere pentru copiiși faceți costume frumoase pentru copii din pungi de plastic , ambalaje, sticle de plastic, carton, reviste lucioase și alte mijloace improvizate.
La ce ar trebui să fii atent înainte de a începe munca?
Dacă faceți un costum de carnaval pentru un băiat, puteți adăuga detalii mai realiste pentru a face personajul mai convingător. De exemplu, pentru un muschetar puteți face o mantie și o sabie, pentru un pirat - un petic pentru ochi și o pălărie cocoșată pentru cap, pentru un prinț de basm - un arc cu săgeți și cizme cu degetele ridicate.
Unul dintre materialele improvizate populare care pot fi folosite pentru a face costume, rochii și bijuterii de casă este pungi de plastic pentru gunoi (sau si pungi de plastic din supermarket). Recent le-am spus vizitatorilor site-ului nostru cum să facă fire din acest material, din care femeile cu aci tricotează pălării, curele și genți uimitoare. Fire de casă din pungi
poate fi folosit si pentru tricotat costume si rochii pentru copii. Dar dacă nu aveți timp deloc sau mai sunt doar câteva zile înainte de spectacolul costumului, atunci puteți face un model și puteți decupa detaliile unei rochii pentru o fată dintr-o pungă groasă de plastic. Dar nu doar copiii noștri au nevoie de petreceri costumate distractive. Evenimente populare precum, Halloween și Maslenitsa sunt rareori complete fără spectacole de costume interesante. Atât tații adulți, cât și mamele se distrează alături de copiii lor, revenind pentru o vreme în copilărie.
Mai jos veți găsi idei interesanteŞi vrăjitor pas cu pas cursuri care vă vor ajuta să faceți costume, rochii și accesorii minunate pentru spectacole de carnaval și mascarade incitante cu propriile mâini.
2. CUM SA FEI RAPID UN COSTUM ORIGINAL PENTRU O FATA DIN INSTRUMENTELE DISPONIBILE
Instrumente și materiale pentru lucru:
Două semifabricate din spumă de polistiren în formă de bilă (pot fi înlocuite cu recipiente Kinder Surprise), hârtie de împachetat, panglică de satin, pistol de lipici, bandă, foarfece.
Etape de lucru:
tăiați hârtia de împachetat și răsuciți-o astfel încât să obțineți o formă alungită, strânsă. Apoi utilizați un pistol de lipici pentru a fixa piesa de prelucrat
Acum trebuie să răsuciți cu atenție piesa de prelucrat într-un inel strâns. Fixați din nou forma rezultată cu lipici fierbinte.
Tăiați un dreptunghi din carton gros și lipiți pe el două bucăți de bandă. Pe cealaltă parte lipim „coaja de melc”
Facem și coarne de melc din hârtie de împachetat. Mototolim corespunzator doua foi de hartie, apoi le rasucim in 2 antene, de care lipim bile de spuma de polistiren colorate cu guasa. Aceste coarne pot fi lipite de o bandă de păr.
3. CLASE MASTER. COSTUME DE CARNAVAL DIN MATERIALE DISPONIBILE
Clasa de master nr. 1:
LECȚIE DE FOTO PAS CU PAS DESPRE CONFECȚIA UNEI PĂLĂRII FRUMOASE PENTRU O MAGIE. NU ESTE NECESAR DELOC SA CUSI SAU SA IMRICOTI ACEASTA COPICIE PENTRU O PERFORMANCE LA COSTUM. VOM CONFECȚI O PĂLĂRIE DIN O Foaie DE CARTON, ȚESAGĂ GROSĂ ȘI MARCA.
Clasa de master nr. 2:
CUM SE FAC PĂLĂRII ORIGINALE PENTRU FETE DIN HÂRTIE CREPONĂ. ASEMENEA PĂLĂRII SUNT UN COMPLEMENT MINUNAT PENTRU COSTUME DE COPII DE CARE VA FIE NEVOIE PENTRU O FATĂ PENTRU O ÎNTREȚINERE, PENTRU O PERFORMANȚĂ DE COSTUMAT DE ANUL NOU, PENTRU UN SPECTACLE DE CARNAVAL.
Clasa de master nr. 3:
CUM SĂ COSTU COSTUME ELEGANTE DIN HAINE VECHII NU NECESARĂ, PÂSLU ȘI ALTE MATERIALE ÎMBUNĂTĂTATE PE CARE LE GĂȘI ACASA. MAI MULTE LECȚII PAS CU PAS CU FOTOGRAFII.
Clasa de master nr. 4:
O CUREA LATĂ ESTE UN ATRIBUT ESENȚIAL PENTRU MULTE COSTUME DE VACANȚĂ. CU AJUTORUL ACESTUI MK VEȚI ÎNVĂȚA SĂ FACEȚI O CUREA ELEGANȚĂ DIN SACURI DE CHIPURI NU NEVOIE, AMBALARE, AMBALATURI DE BOOMĂ.
Clasa de master nr. 5:
MULTE OPȚIUNI INTERESANTE PENTRU DIFERITE COSTUME DE CARNAVAL PENTRU COPII PENTRU NOUL AN. FACEM HAINE PENTRU PERFORMAȚII COSTUME PENTRU BĂIEȚI ȘI FETE CU PROPRIILE MINI.
Clasa de master nr. 6:
DACĂ TREBUIE SĂ CONFECȚI RAPID O ROCHIE ORIGINALA DIN MATERIALE DISPONIBILE, ATUNCI VOM FOLOSI... SACI DE GUNOI PENTRU MUNCĂ. LECȚIE CU FOTO ȘI DESCRIEREA ETAPELOR LUCRĂRII.
Clasa de master nr. 7:
CUM SĂ FACEȚI INTERESANT